| The bark on white birch is waterproof. Hence, while the bark stays in tact, the inside rots away. Normally, I would take a piece like this to the sawmill and slice it lengthwise to get a number of pieces about 1 1/2" thick from which I would make a platter or bowl. If I had done that the entire chunk of wood would have fallen apart. So instead I had it cut crosswise. With careful handling it held together fairly well. 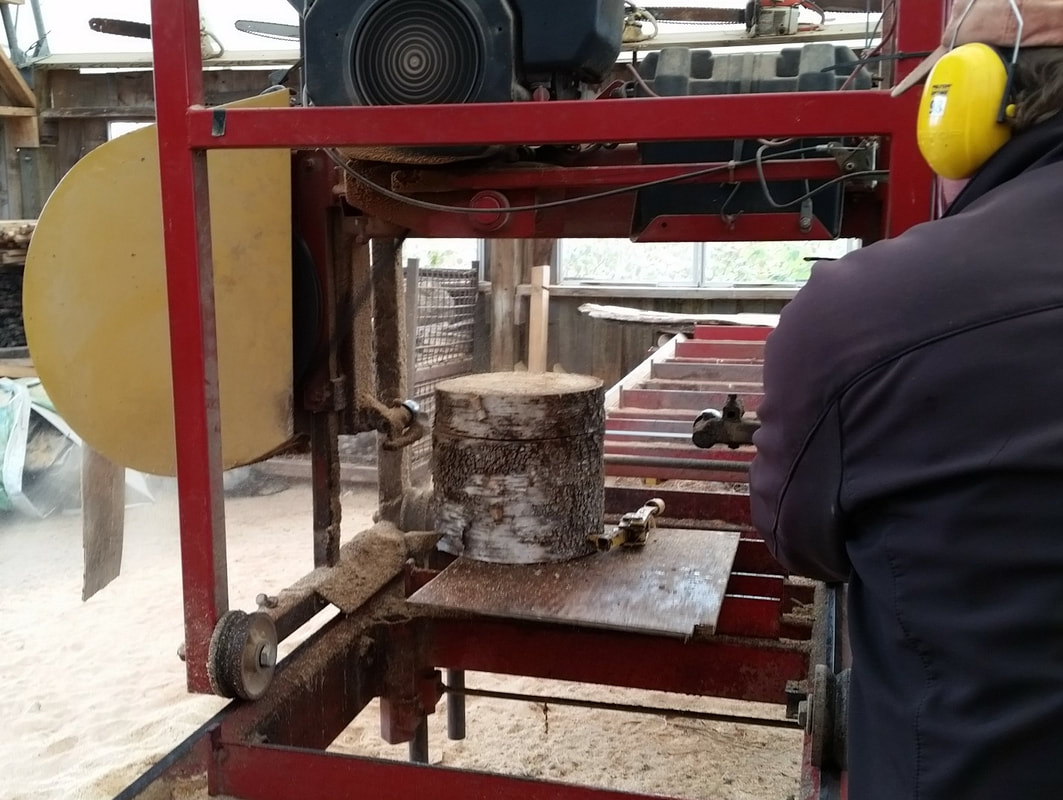 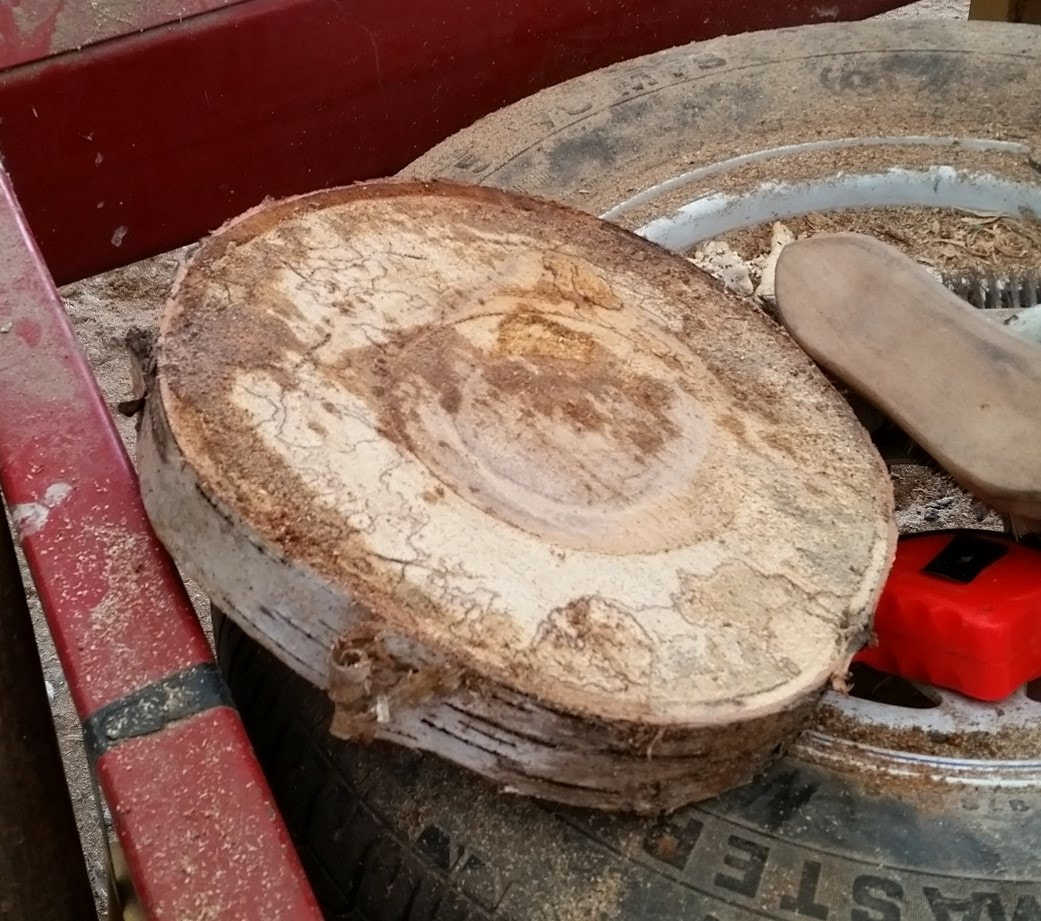 Below is what the top of the blank looked like before turning. 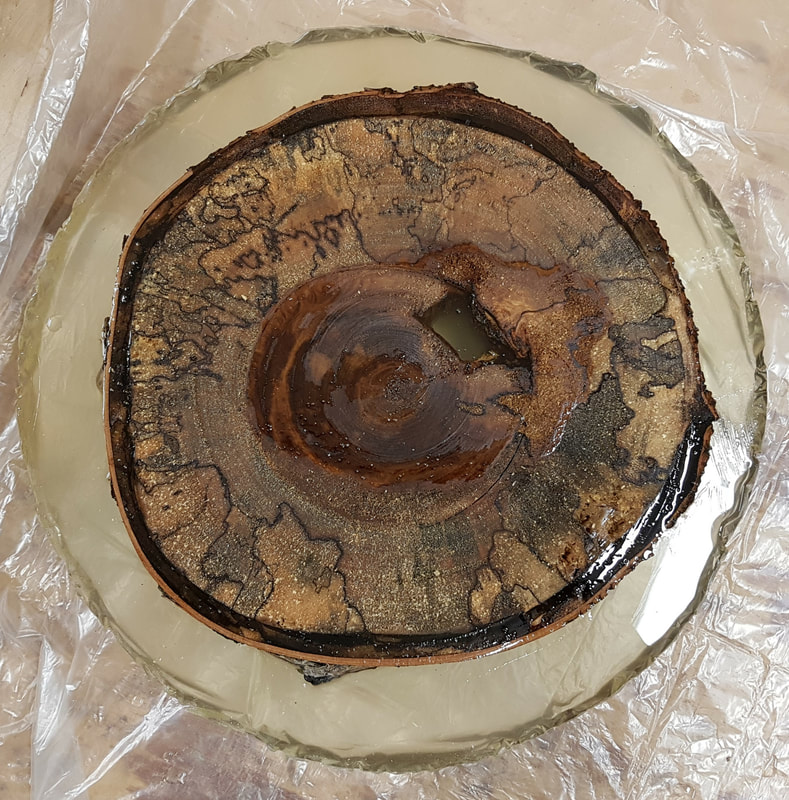 And this is what the back side looked like after the first turning. 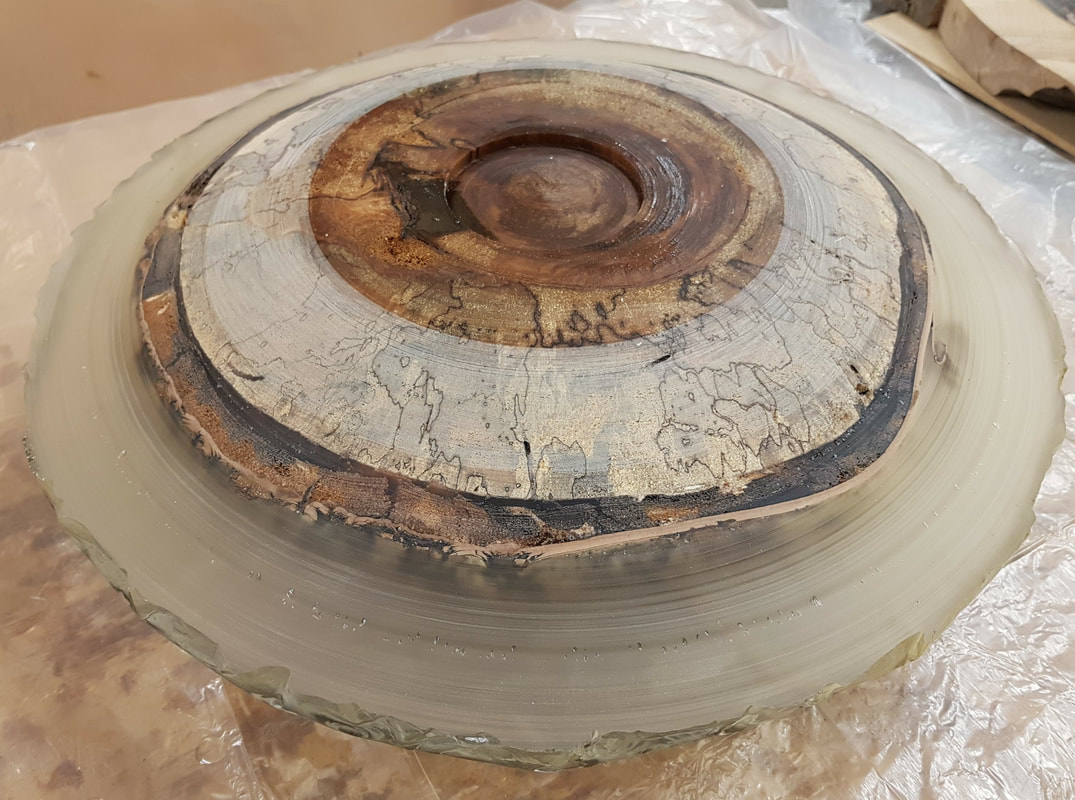 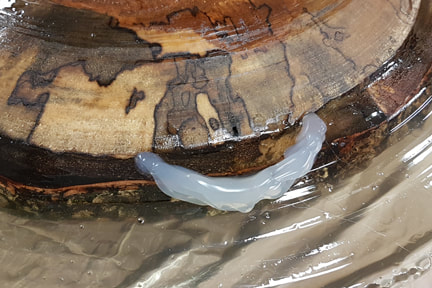 |  The wood was cut in the fall of 2017 and stickered in the studio to dry for the winter. I put one of the rounds in a mold and impregnated the rotten wood with diluted epoxy and surrounded the part of the piece that I wanted to retain with full strength clear epoxy. (I will talk more about making and using molds in another installment.) Below is the blank on the lathe awaiting the turning of the chuck hole. 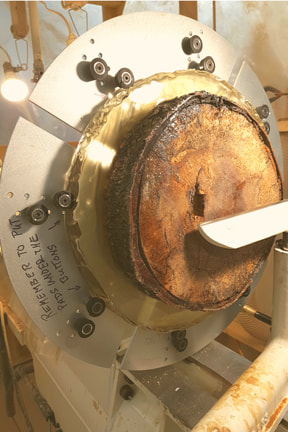 The piece had to be turned in several steps. The reason for this was the wash coat of epoxy could only penetrate about 1/4" to 5/16". Once this was turned away the rotten wood proceeded to tear out and more penetrating epoxy was needed to harden the wood for turning. Some problems became apparent after the first turning. Gaps that needed to be filled with epoxy had to be addressed. In order to solve this problem quickly, I created small dams with hot glue to hold the epoxy in place until it hardened. These gaps appeared along the edge of the bark and needed to be filled to secure the bark to the rest of the wood. I will finish this discussion later. Until then... |
|
0 Comments
Your comment will be posted after it is approved.
Leave a Reply. |
Categories
All
Archives
February 2019
|
 RSS Feed