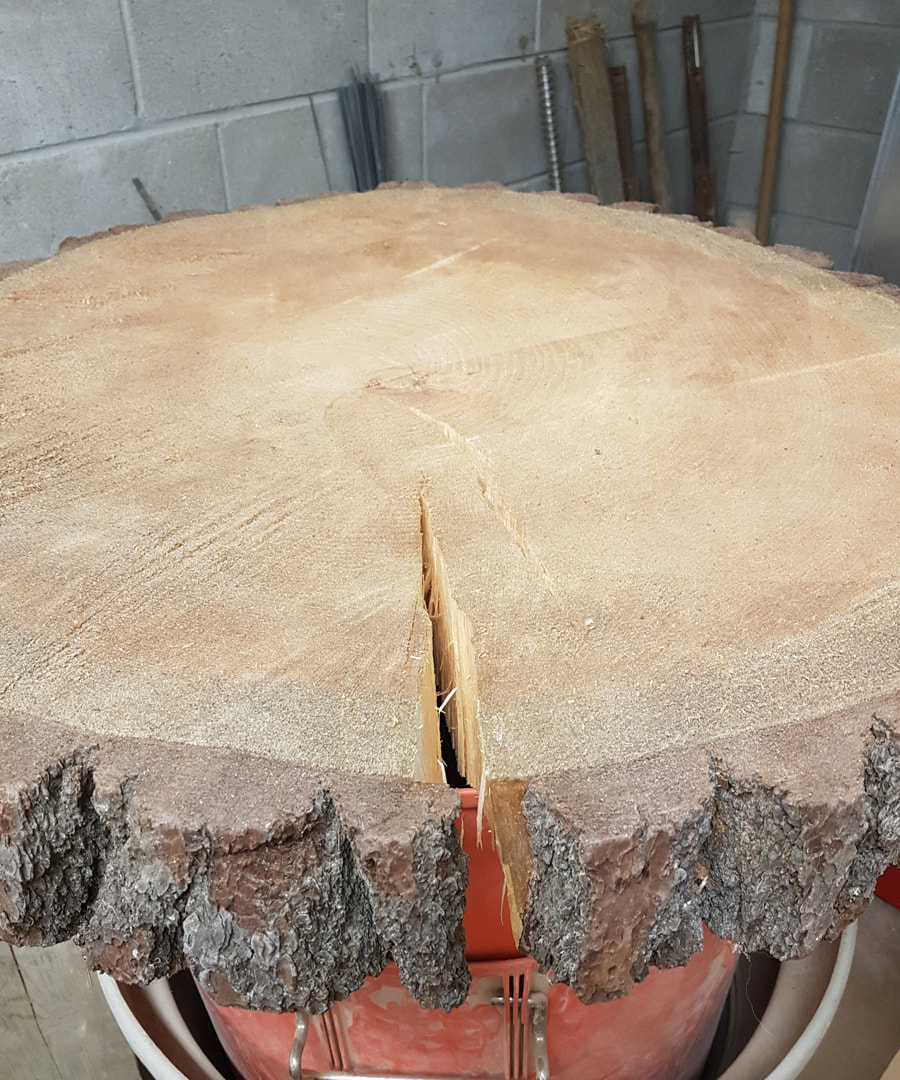
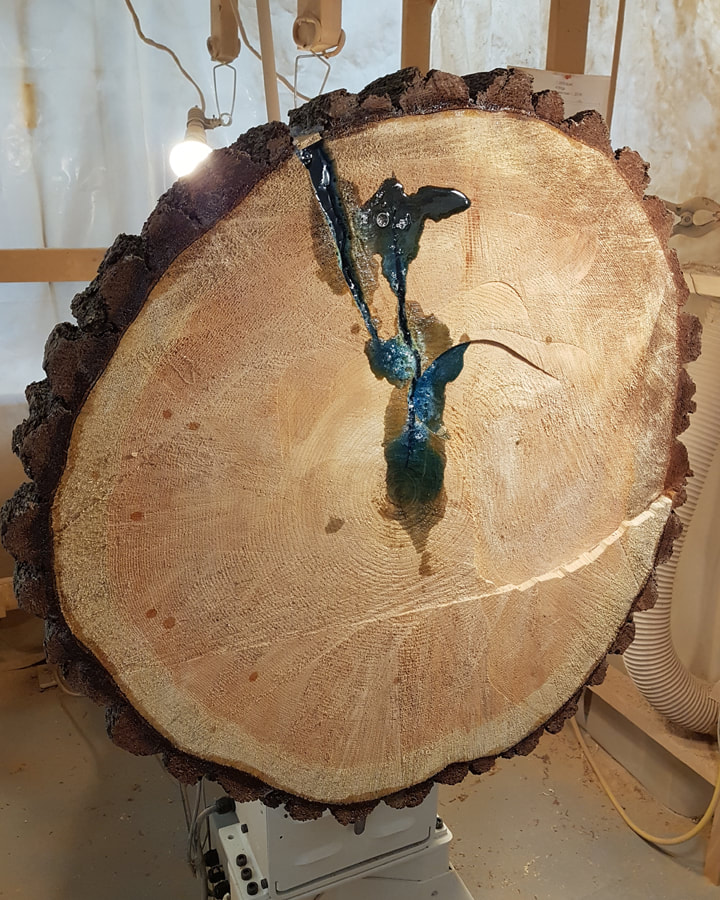
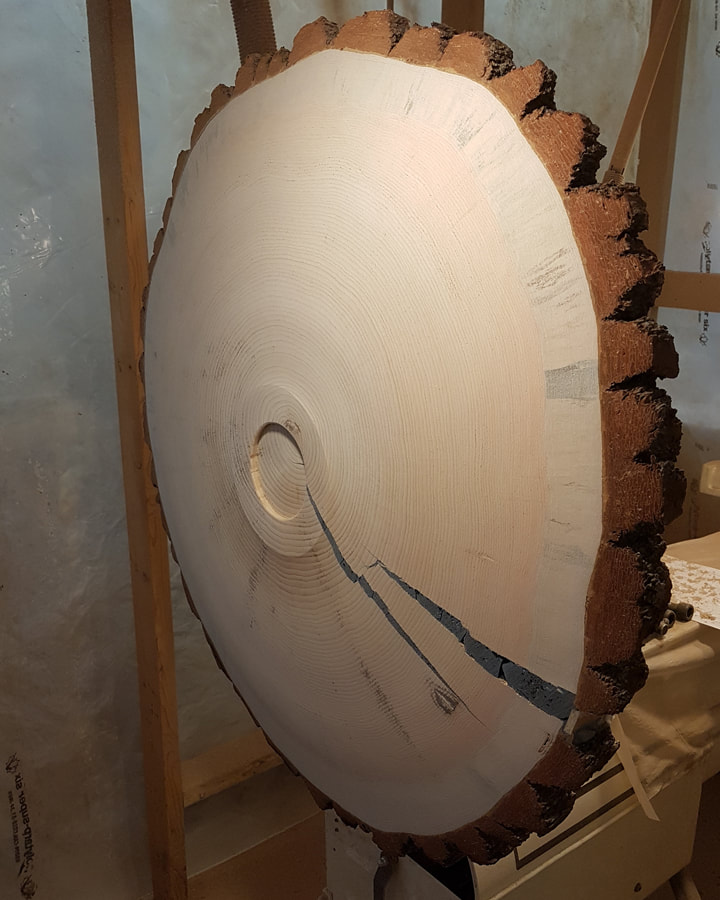
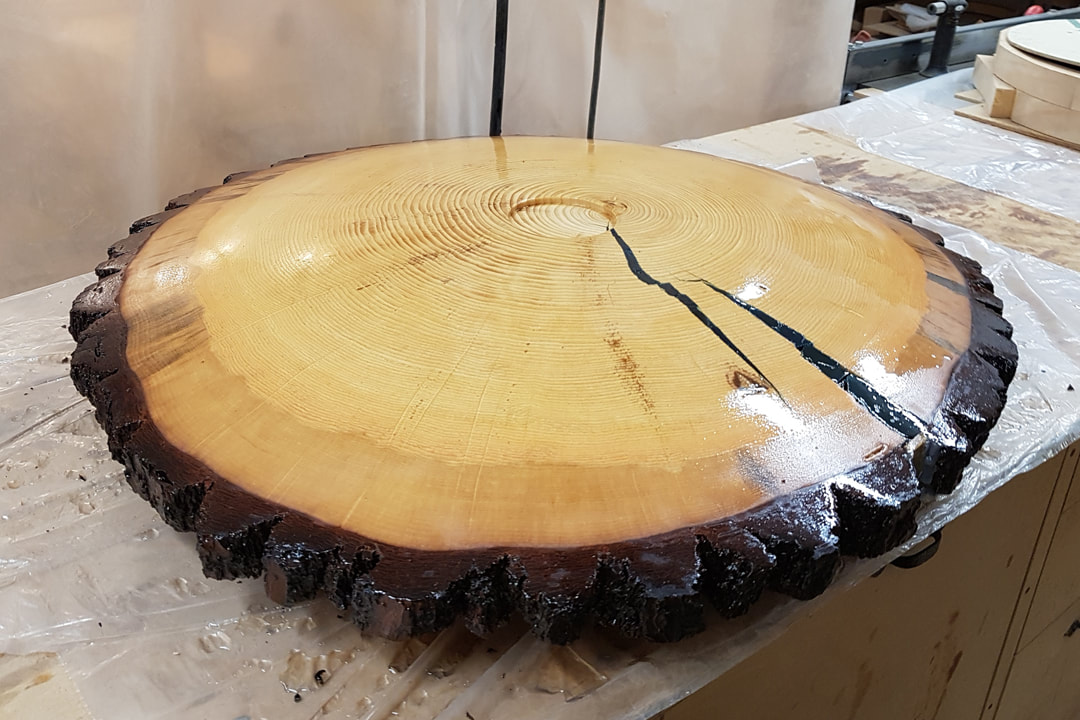
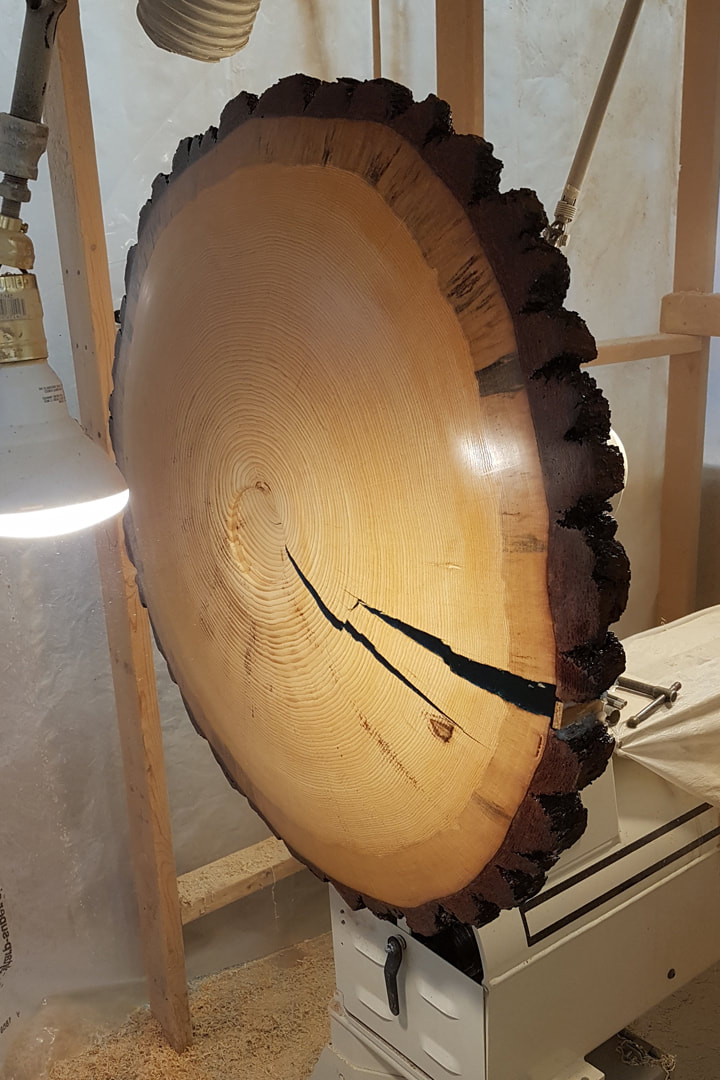
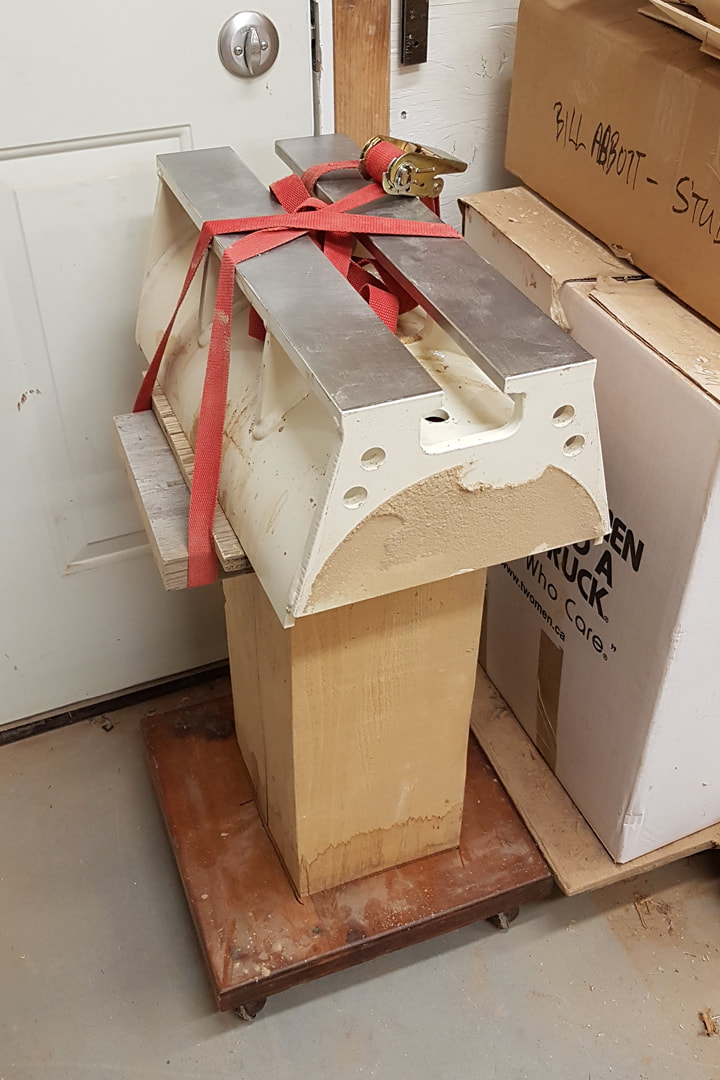
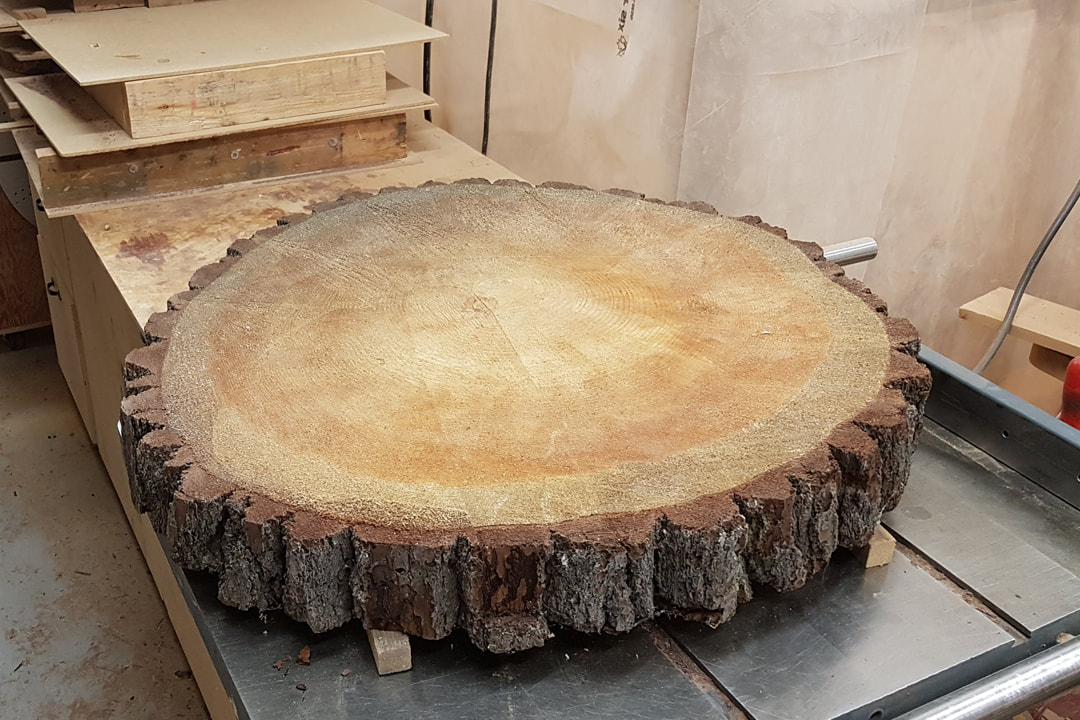
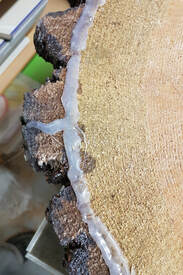
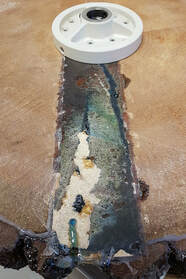
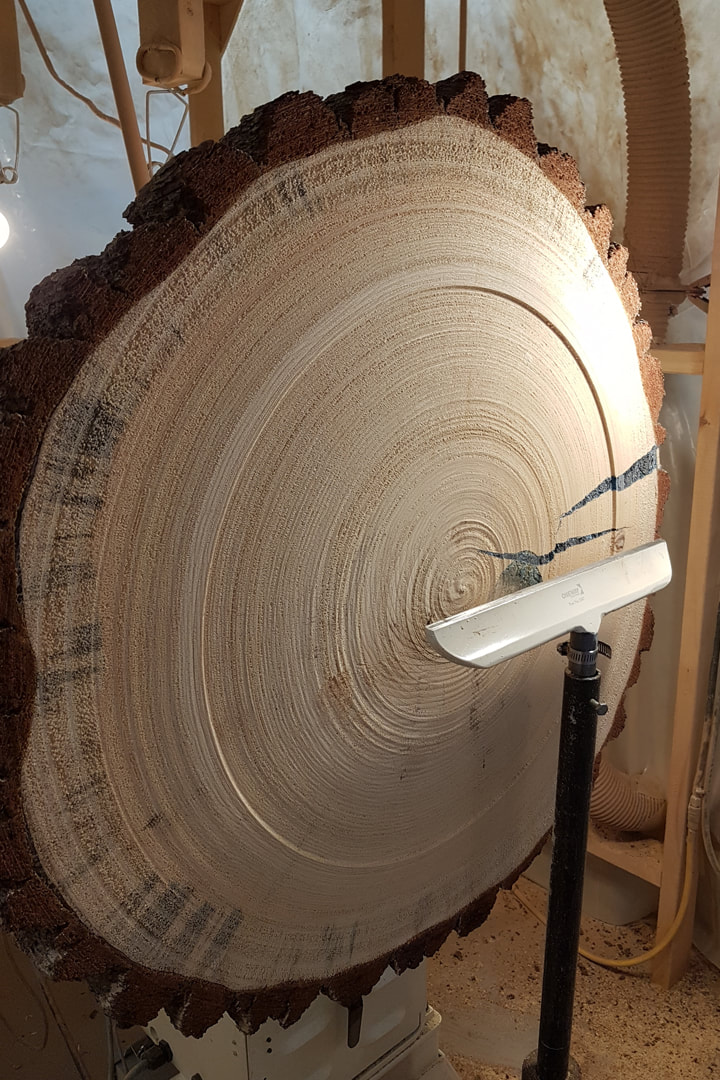
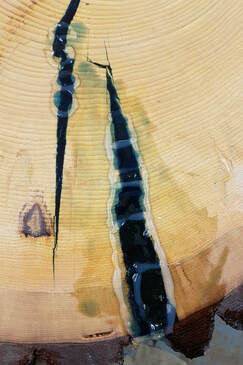
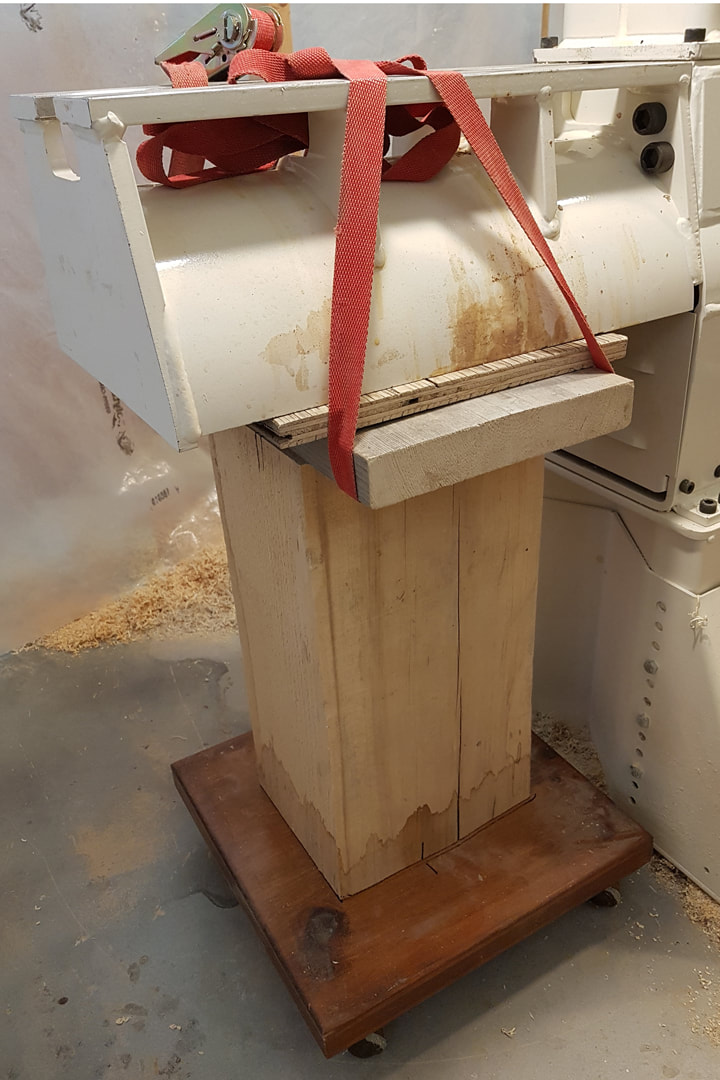
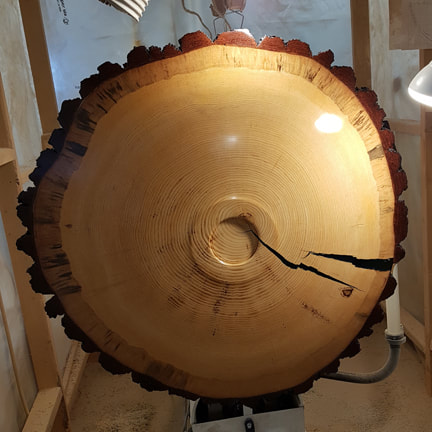
| I am taking a little break from the past to cover a piece that I am currently working on. Part of the reason is to remember what I have done and to help my thinking moving forward to the completion of this turning. The rest is to give me a break from writing about the wood and epoxy pieces. The next piece in that series is a highly complex turning that went through a roller coaster ride of processes but ended up being very successful. In the late fall of 2017 a client brought in the slab of pine at the right. At its widest point is was 32" in diameter. I have trouble saying no to a challenge and this was no exception. However, a few days in, I was having second thoughts about this. On the plus side, I had about a year for the piece to become fully dried and on the negative side I had to decide what I was going to do at the end of that year. I was decided that the flat side should be the top and the bottom of the piece should be turned first. The reasoning behind this was that the first time on the lathe would have to be done using a face plate. In order to turn the screw holes away they would have to be on the top of the piece. The first thing to do was to fill the crack. This was started in early December. A piece of 1/4" particle board was waxed with mold release and hot glued to the flat side of the slab. Another piece was added to the vertical part of the split. With the blank upside down the gap was filled with a single pour of epoxy tinted with blue colouring. This was allowed to harden for several days. The pour did not go well as several large cracks appeared. This required 3 small pours to fill the cracks and make the slab ready to turn. There was one other epoxy job that needed attending to before the piece could be put on the lathe. The bark had started to pull away in places and to keep it with the slab I had to pour epoxy in the gaps around the rim. To keep the epoxy from leaking away the face plate side had to be hot glued along the join between the bark and the wood. With the epoxy satisfactorily poured and hardened the bottom part of the mold was removed. The vertical part was left in place to ensure the integrity of the rim. The particle board did not come away as cleanly as I would have liked but that would be dealt with later. The turning had to be done using a free standing tool rest. Different but satisfactory. As the piece was not round and had a heavy side to it, it was necessary to turn it a slow speeds. This meant keeping the tools sharp and being very patient. After the wash coat was thoroughly dry I set about filling the cracks that had appeared in the turning process. In order to keep the epoxy from flowing away I used hot glue barriers and dams to hold it in place until it hardened. It took several rounds to fill these cracks. Filling the cracks was frustrating. In the future I will make the initial pour in a series of steps which should completely eliminate this problem. When the epoxy was hardened the hot glue barriers were removed. The piece was mounted on the lathe and sanded through grit 400 after which the first coat of finish was applied. I made this jig on casters that matches the height of the bed almost perfectly. I am able to undo the bolts and roll the bed away to a storage area. I was worried that the weight of the bed would make the jig top heavy so I used a tie down to securely fasten the bed to the jig. Surprisingly, it worked perfectly the first time. This brings me to the present. Today I put the 5th coat of finish on the bottom of the piece. I think it needs one more coat. I will have some help next week to mount the chuck, remove the face plate and re-mount it on the lathe to turn the top. Doing the top will be similar to doing the bottom. I will have more on this turning later. Until then... P.S. Remember that you can click on any image to view an enlargement. | I put the piece in my heated wood room to dry thoroughly. In April of 2018 I looked in on it and noticed that a crack was forming from the edge towards the center. I knew that this was part of the drying process but it added a complexity to the completion of the turning. All the turning would be on end grain so the wood would have to be sealed using a wash coat of epoxy. By employing this method the dry wood could not respond to its environment because it would be totally sealed. Therefore the crack would not close on its own and would have to be filled. This would be a problem to be solved further down the road. After seesawing back and forth between a large shallow bowl and a table top, I finally, in the late fall of 2018, decided on a shallow bowl. The table top was really a cop out and would not have satisfied me as having met the challenge. The client had given me total freedom in what to make and I wanted to give him something that would blow him away. The piece was finally mounted on the lathe and it took two of us to get it there. I usually turn outboard so I have a bed on that side of the lathe. This had to be removed. That was a bit of a job in itself as it hadn't been off the lathe in many years. Finally the piece was turned and rough sanded. The turning and sanding revealed additional cracks in the epoxy. Note the chuck hole in the center of the back side. This will be how the piece will be remounted on the lathe to turn the top side. The wood I had been turning was all end grain and it was necessary to ensure that the piece wouldn't split or fall apart at some point down the road. At this point the sanded surface plus the bark was given a wash coat of epoxy. It took two of us to get it off the lathe after the first coat and it was with difficulty that we didn't damage the finish. There had to be a better way of doing this. The other drawback was that I would only be able to work on this piece if there was someone else in the studio with me. I have two apprentices who come several times a month so this this would mean that it would take me the better part of a month to finish just the bottom of the piece. Part of the difficulty in working with a slab this big is the removal of the outboard lathe bed. I found that it takes two people to accomplish this; one to hold the bed and the other to release the bolts. I decided that if I could work out a way to remove the bed without help I might be able to put on a coat a day and considerably reduce the finishing time. The piece was reduced in weight and I was able to manage it myself. I fixed the lathe shaft in place and slowly turned the slab on to the head stock by hand. This worked and I was able to buff the piece on the lathe and apply the next coat of finish. I solved the problem of removing the wet piece from the lathe by not removing it. I put the finish on as the last job of the day and leave it on the lathe overnight to dry. In the morning, I take the piece off the lathe and put it in the finishing room, restore the bed to the lathe and carry on with the rest of my jobs for the day. At the end of the day I, once again remove the bed and put the piece on the lathe and apply the next coat of finish. |
|
0 Comments
Your comment will be posted after it is approved.
Leave a Reply. |
Categories
All
Archives
February 2019
|
 RSS Feed
