Jim Lorriman, Wood Turner
  • Home
  • Galleries
    • Hopson Grace
  • Wood Turnings
    • Salad Bowls >
      • B Style Salad Bowl
      • K Style Salad Bowl
      • T Style Salad Bowl
    • Platters >
      • Wood Available for Platters
    • Chargers >
      • Wormy Butternut
      • Recycled Cedar Dock Wood
      • Manitoba Maple
      • Spalted Maple
      • Eastern White Cedar
      • Spruce
    • Recycled Dock Cedar Bowls
    • Other Turnings
    • "Stick" Vases & Bowls >
      • Vases
      • Carved Vases
      • Bowls
      • Todgham Bowls
    • Commissions
    • Looking After Your Wood Turning
  • The Studio
    • Getting to the Studio
    • Custom Made
    • Methods of Work >
      • Making a Stick Vase
      • Tips, Tricks and Techniques
      • Details about turning concentric rings
      • How to make a Smudge Box
      • Stylized Canoe Experiment
    • Links >
      • Suppliers
      • Organizations
  • Upcoming Events
  • Blog
  • Biography
    • C.V. Jim Lorriman
    • Craftsman's Statement
  • Contact

The Watcher - Part 1

2/20/2019

0 Comments

 
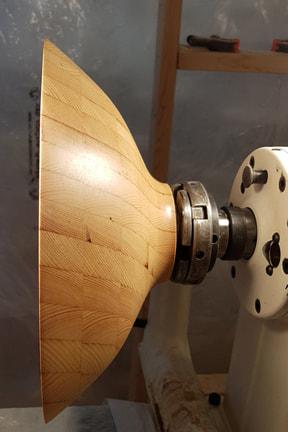
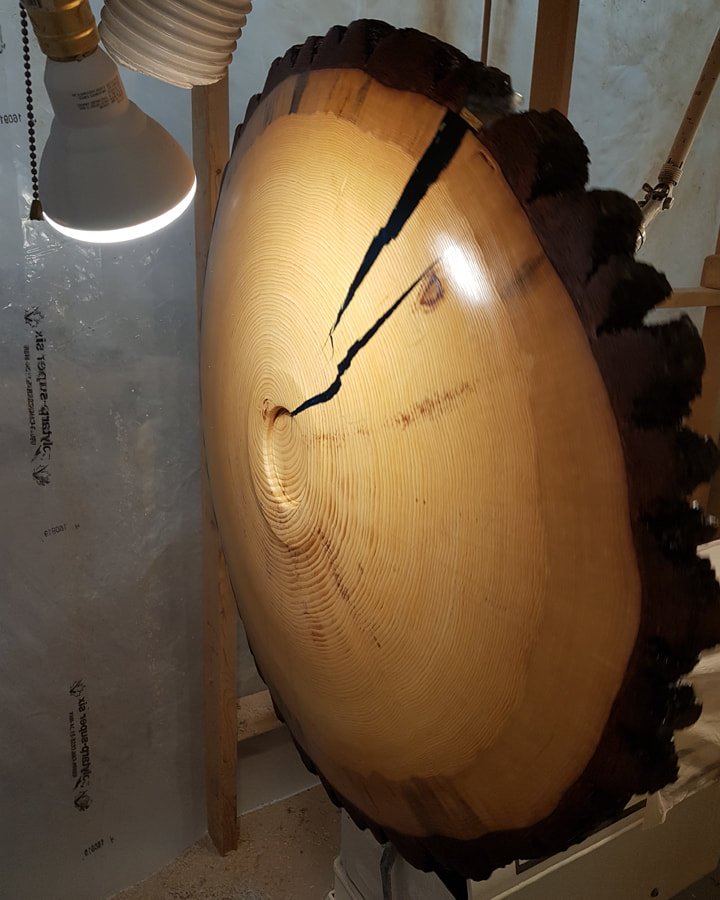
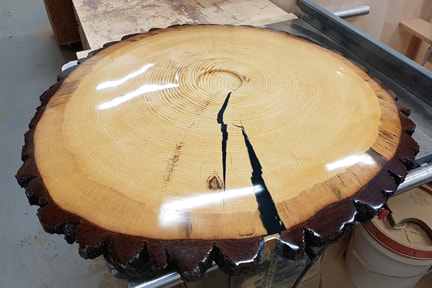
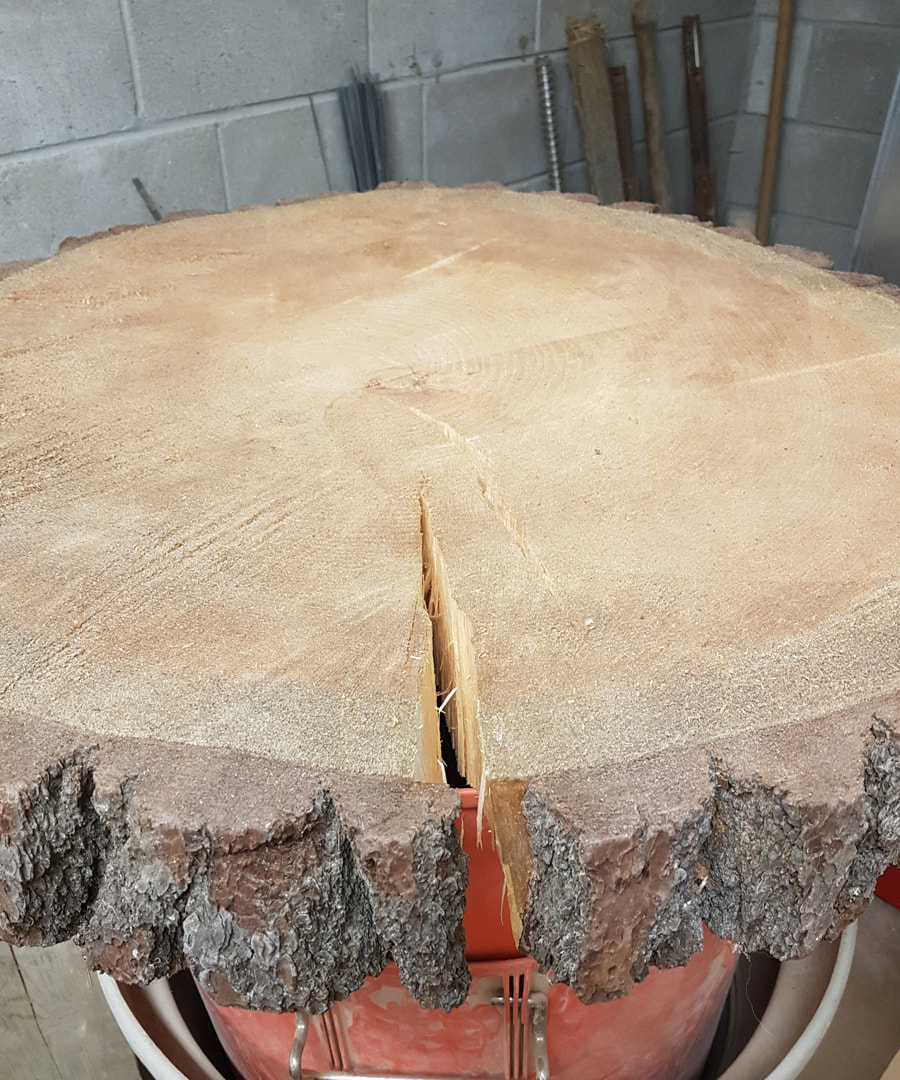
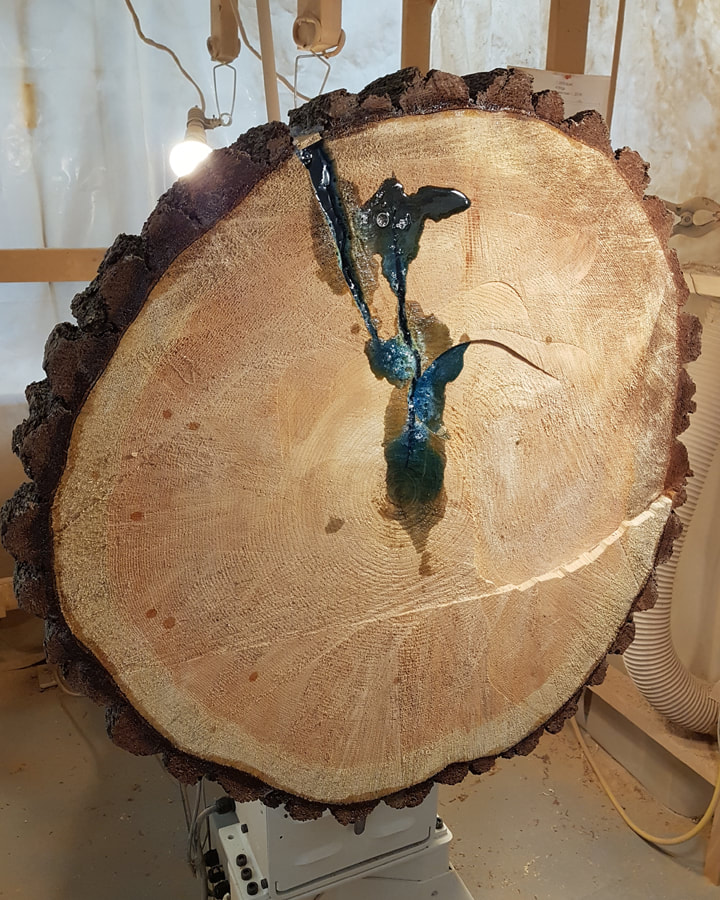
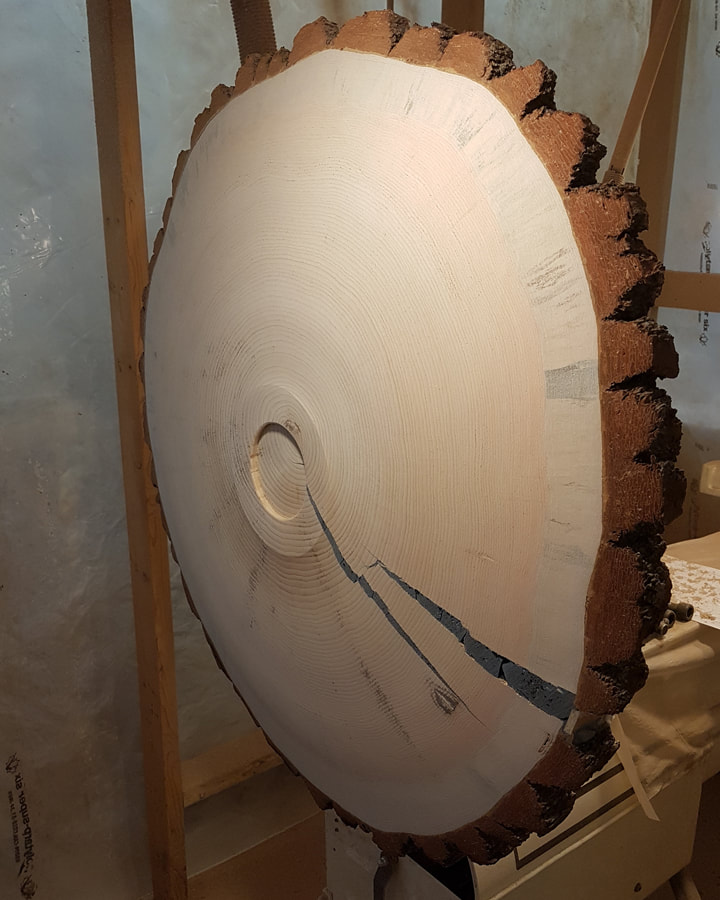
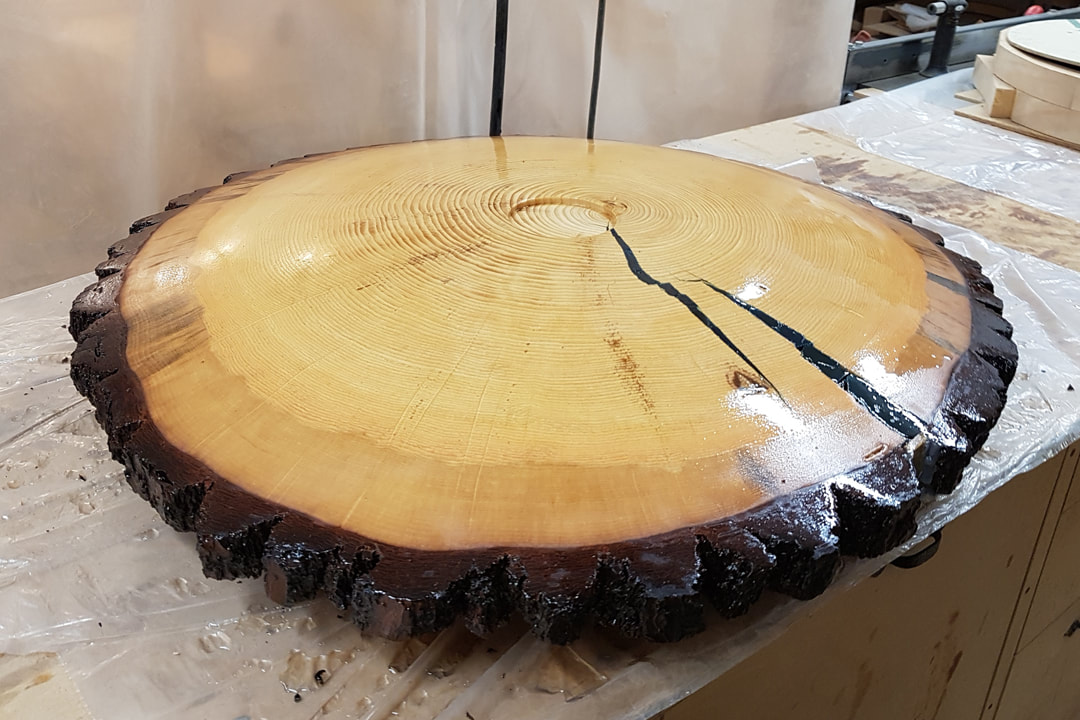
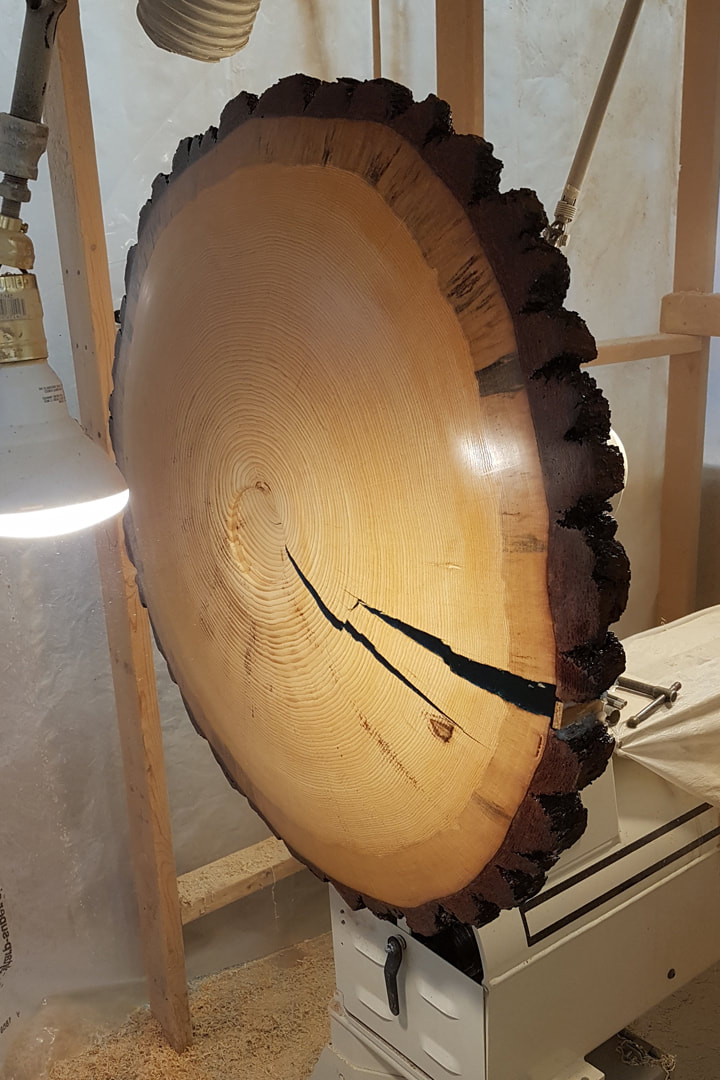
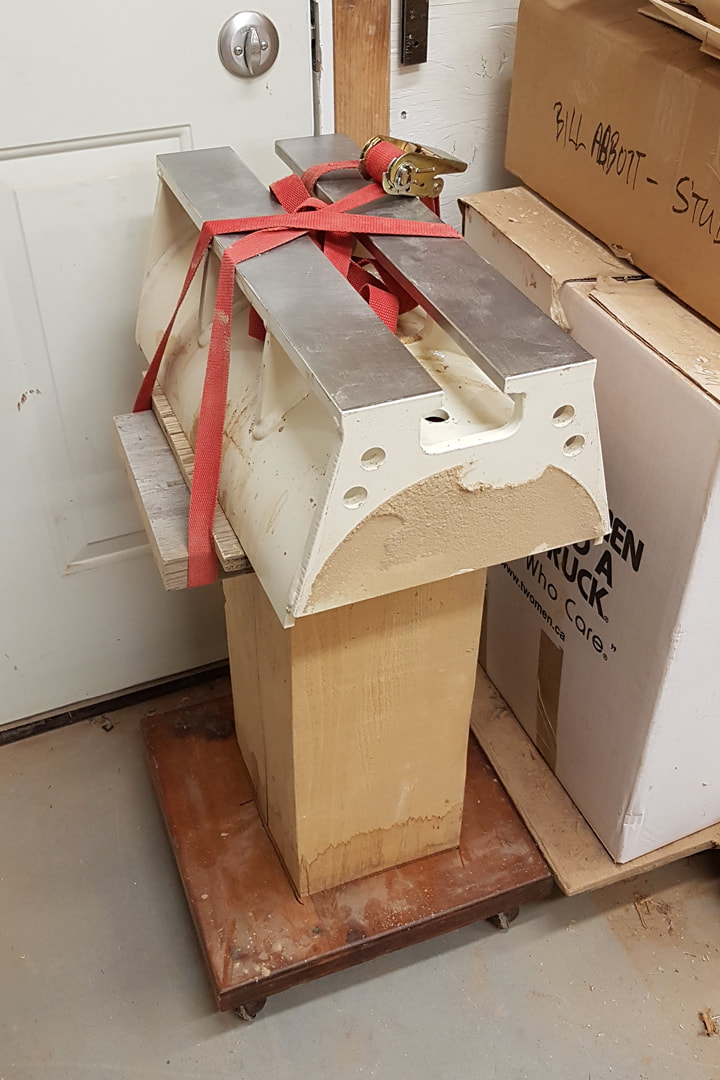
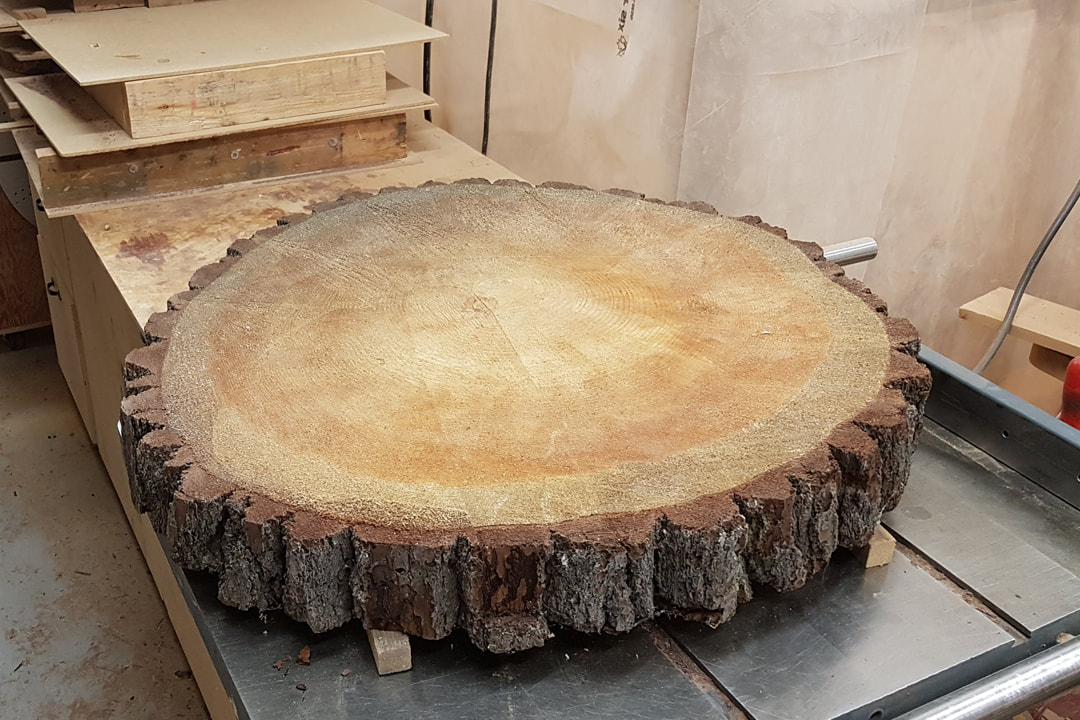
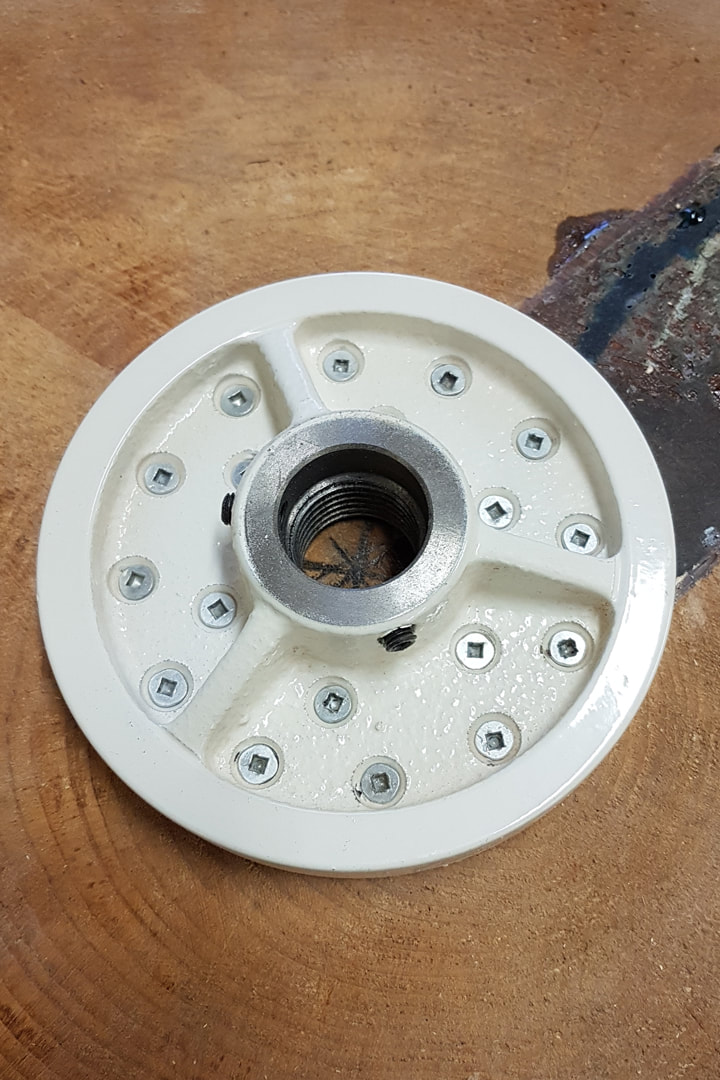
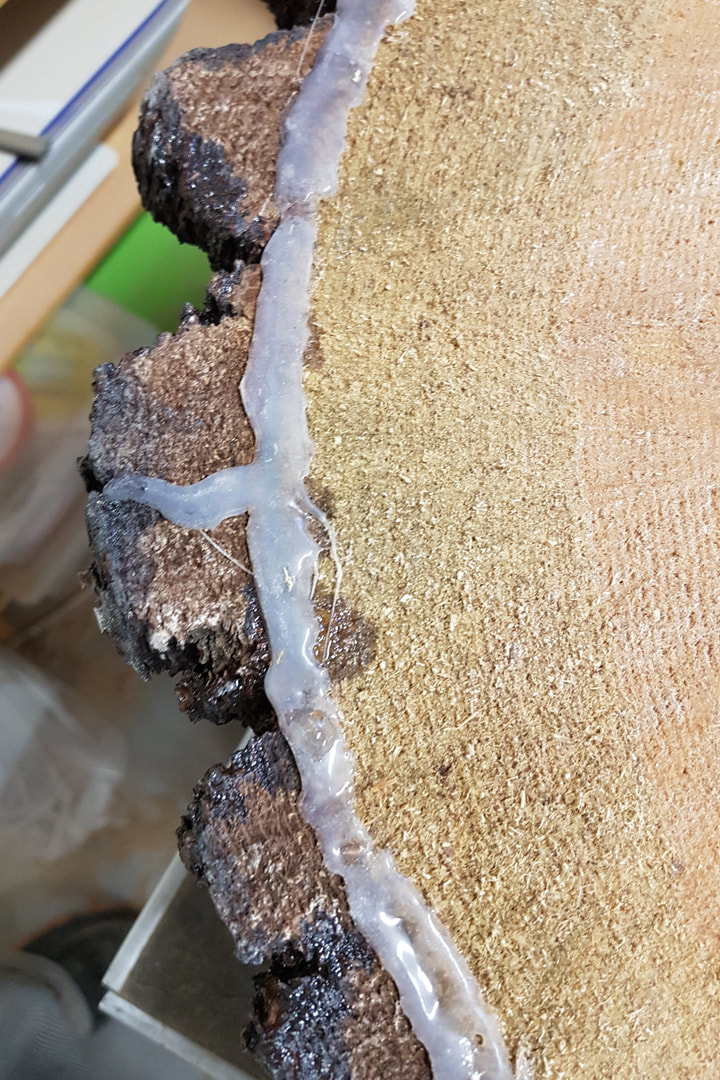
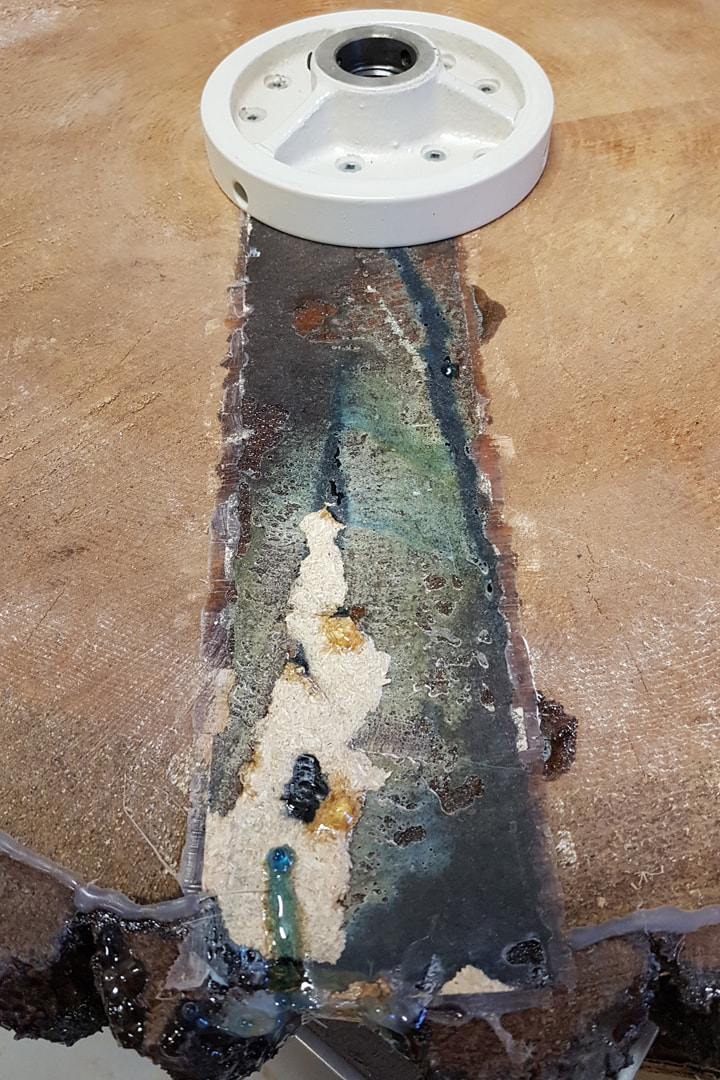
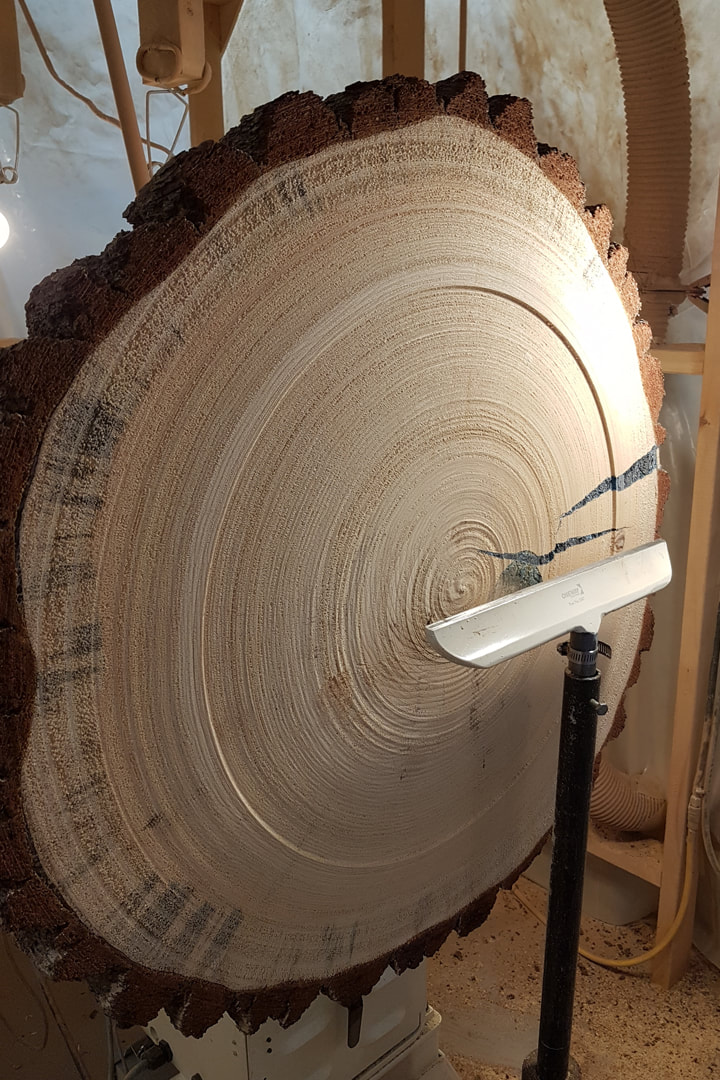
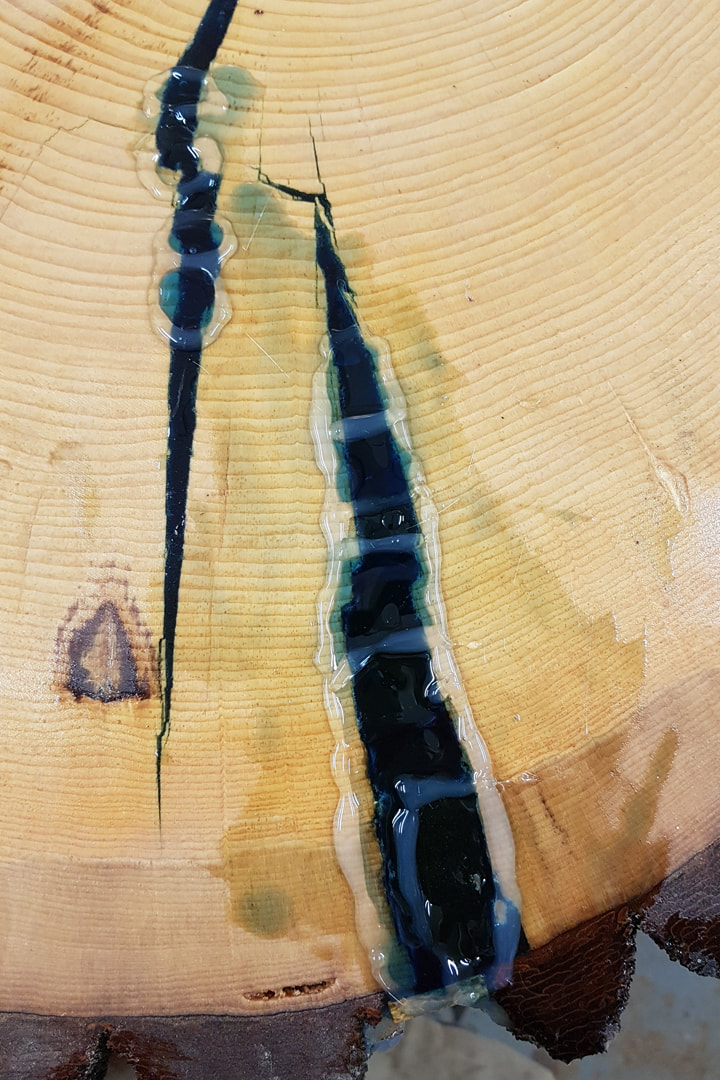
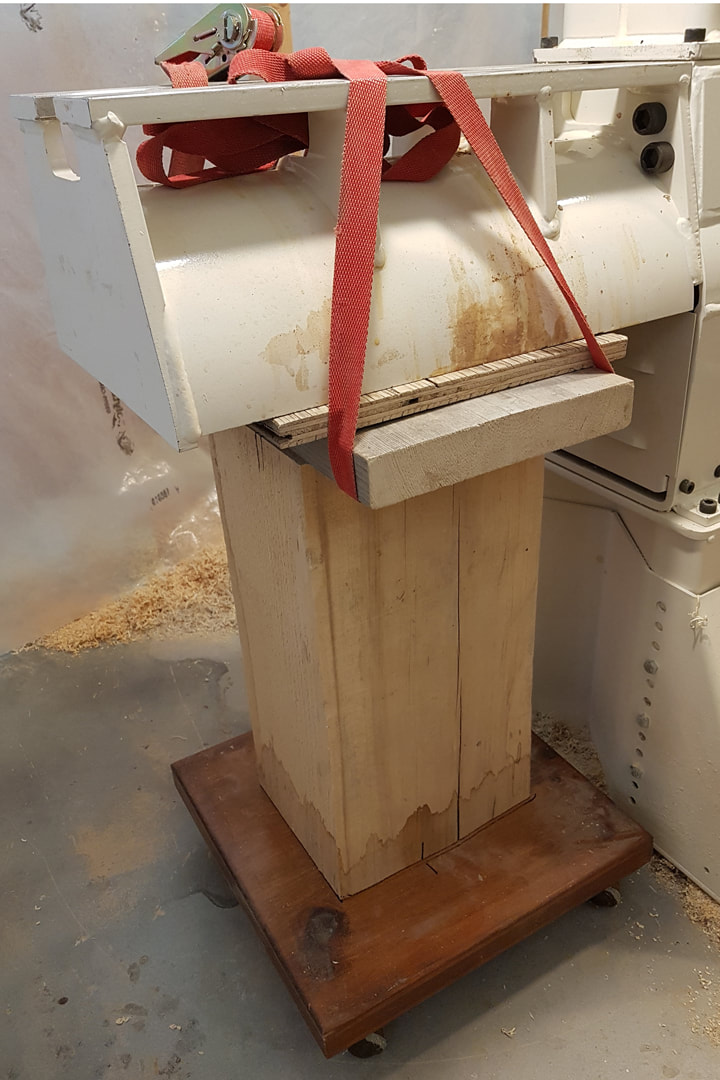
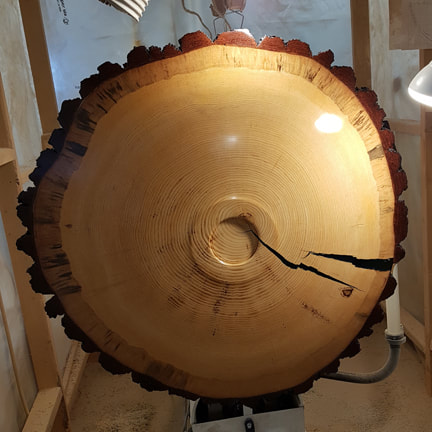
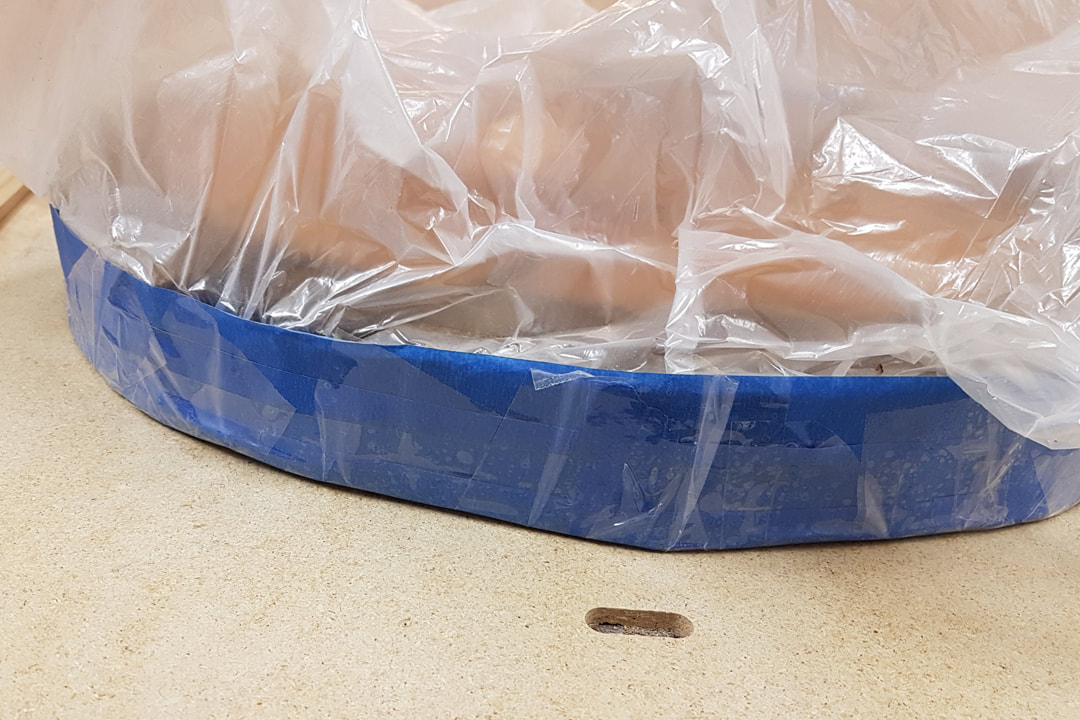
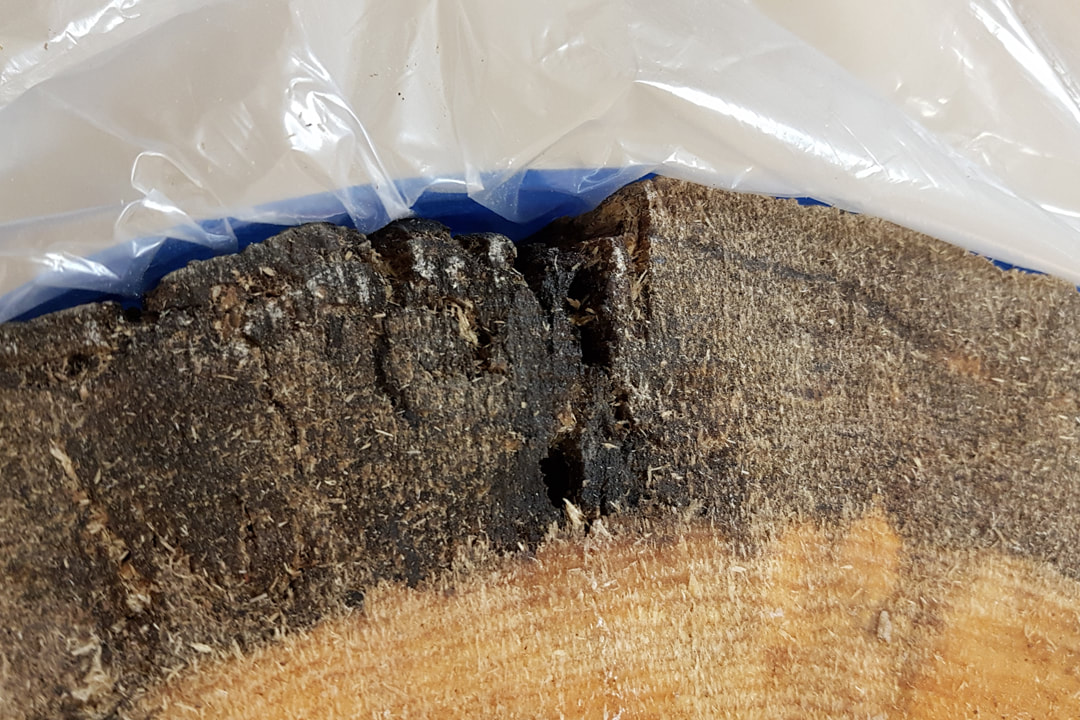
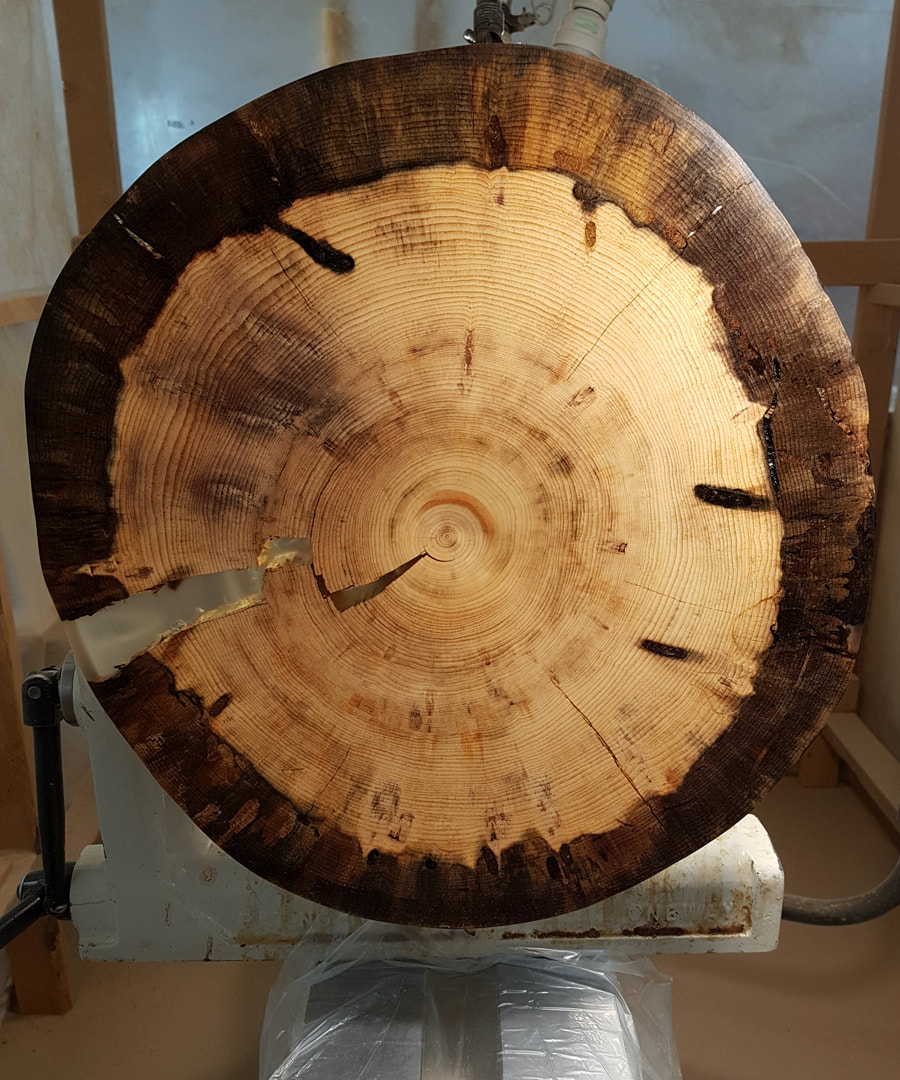
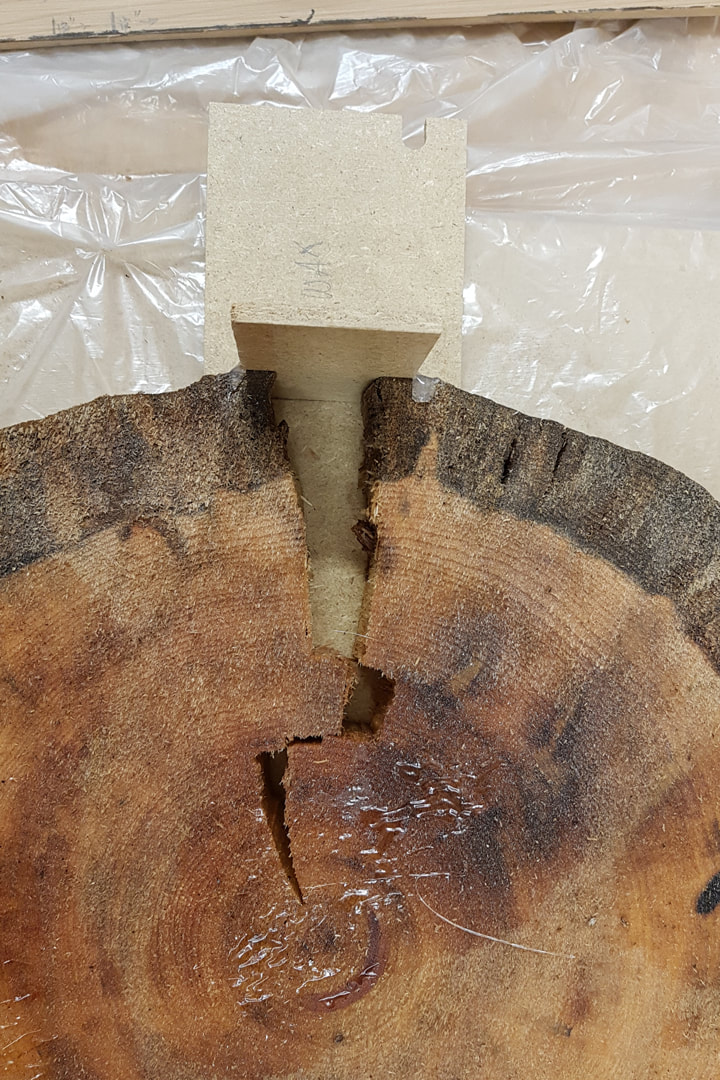
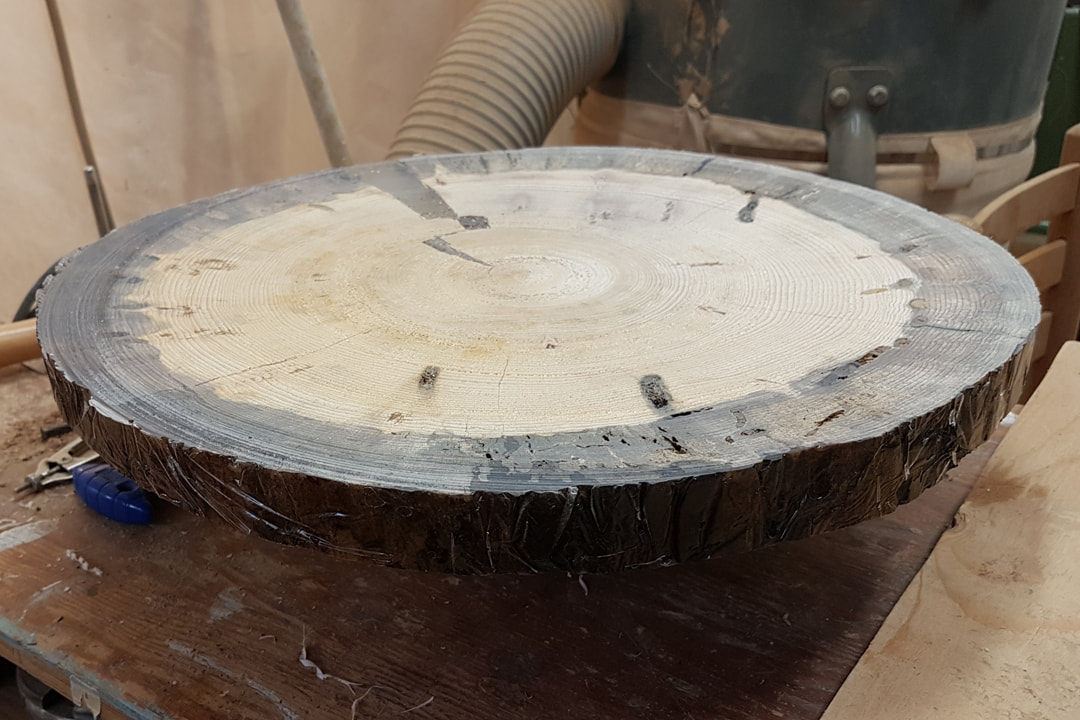
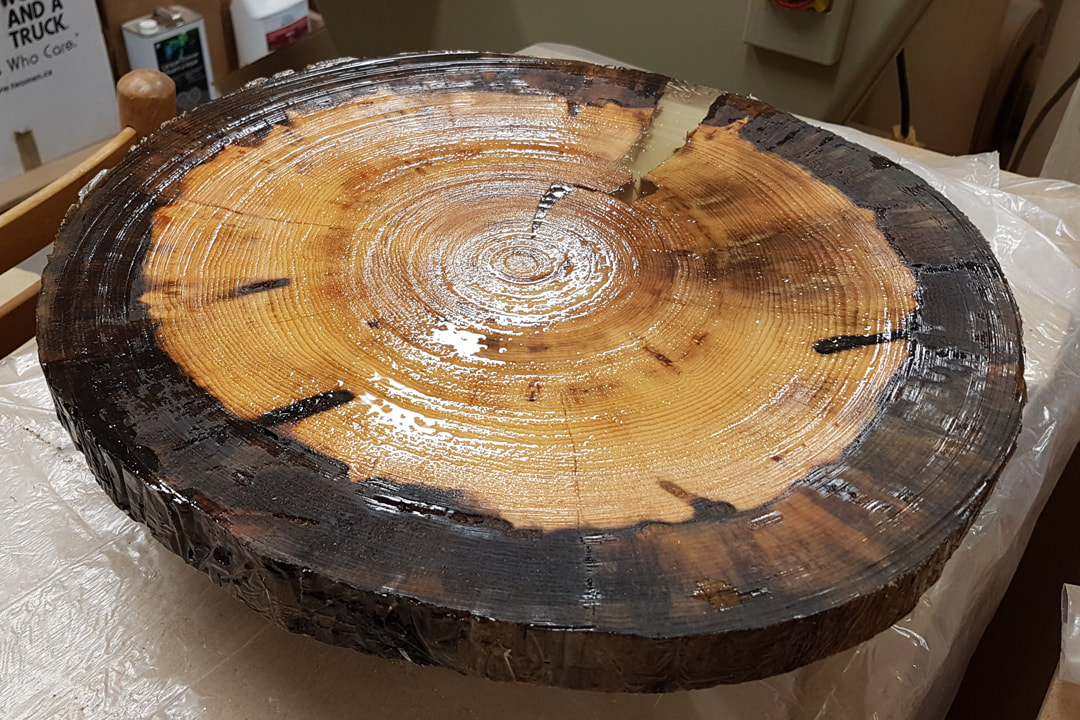
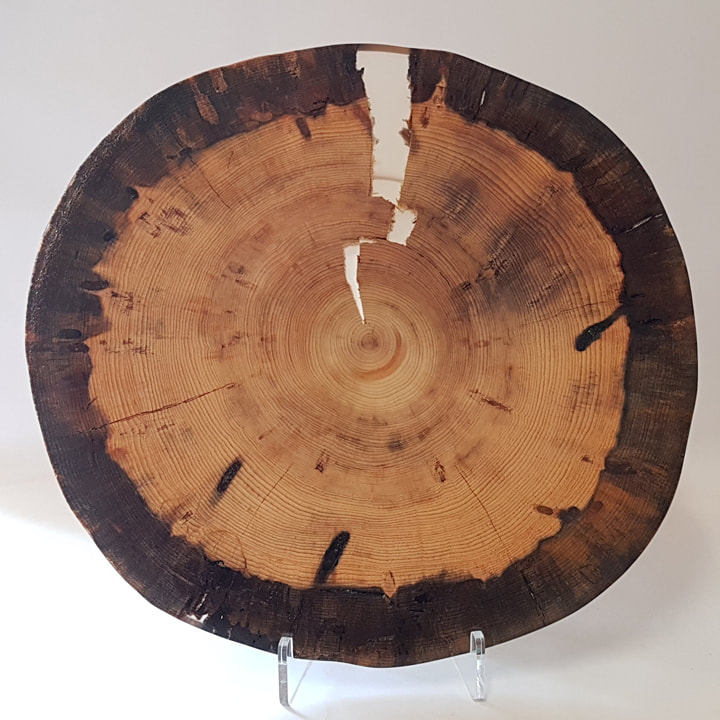
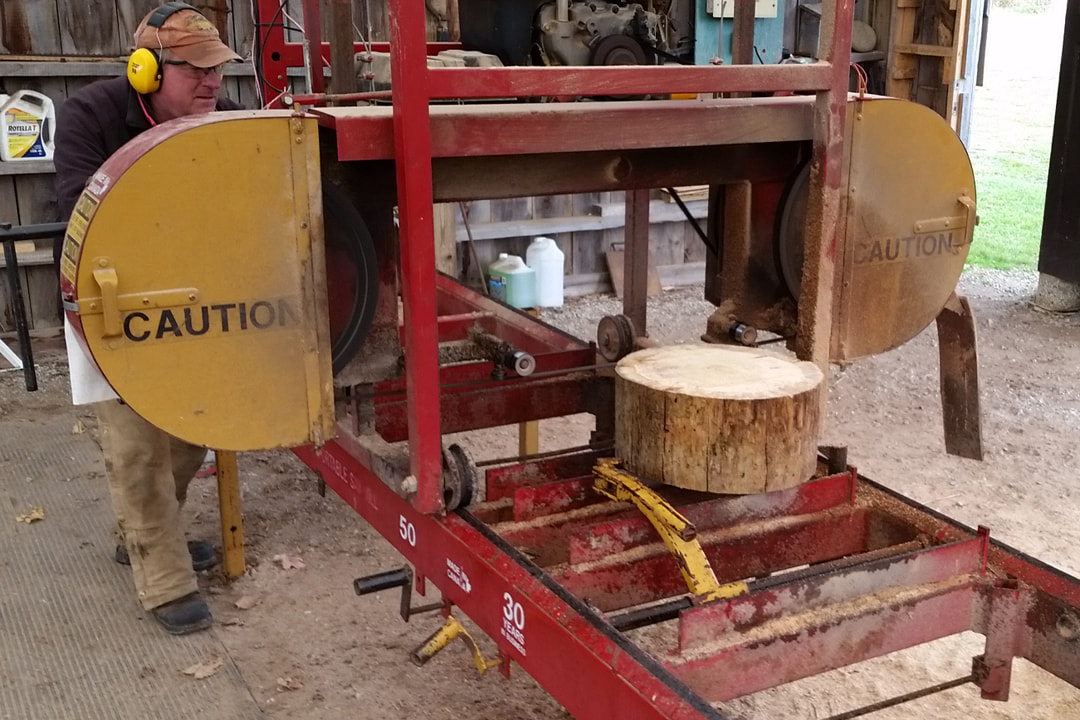
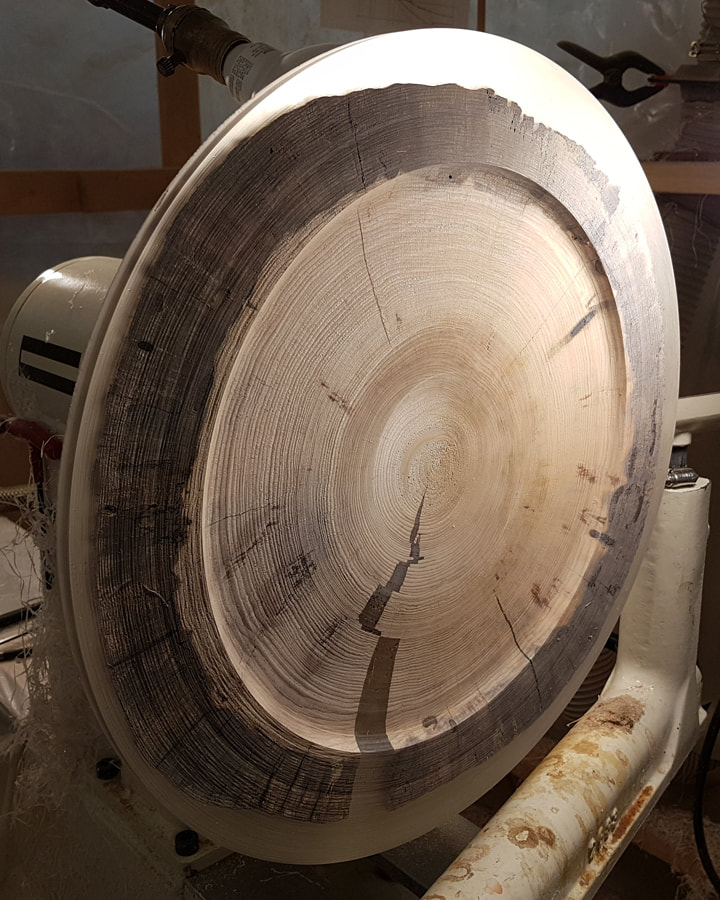
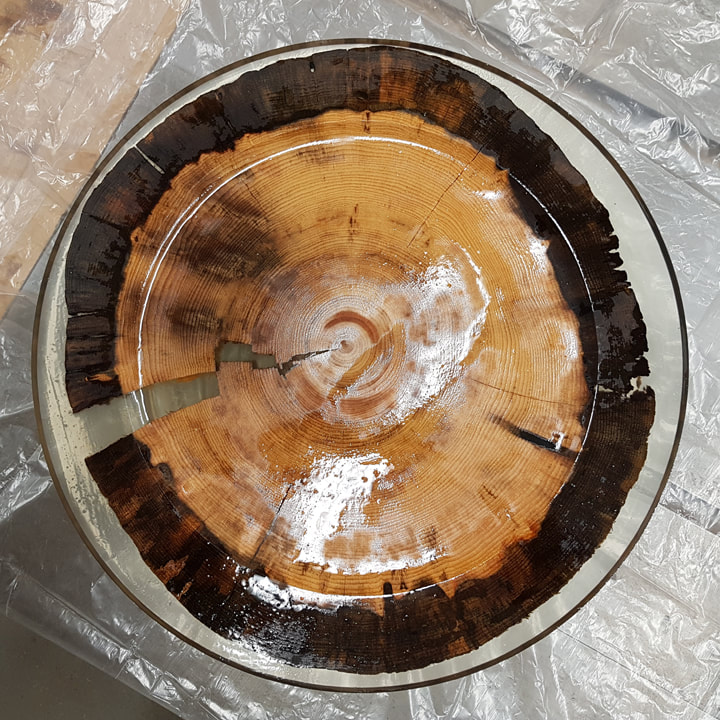
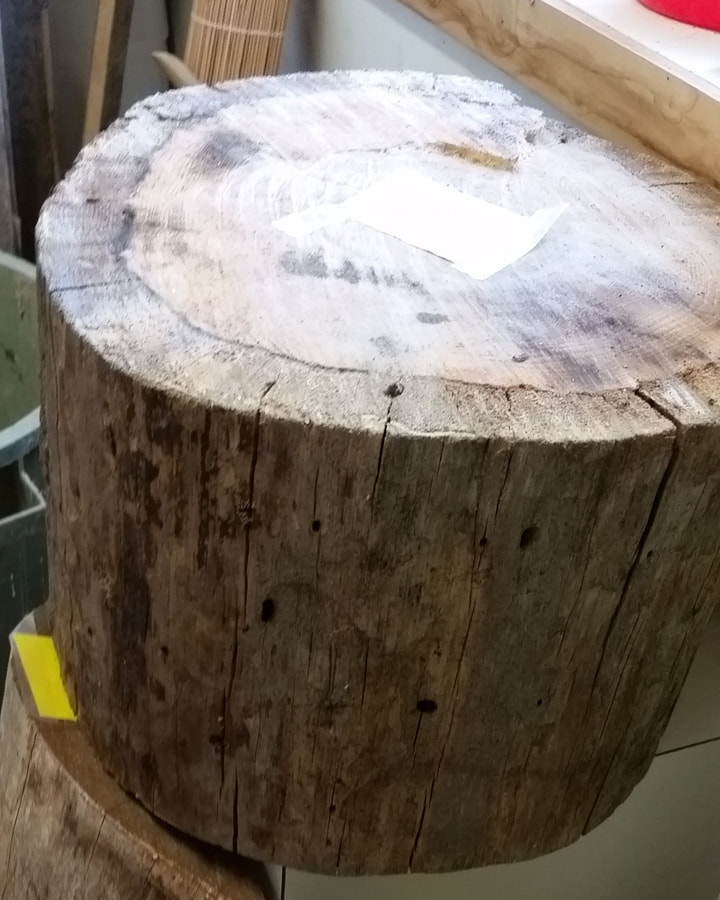
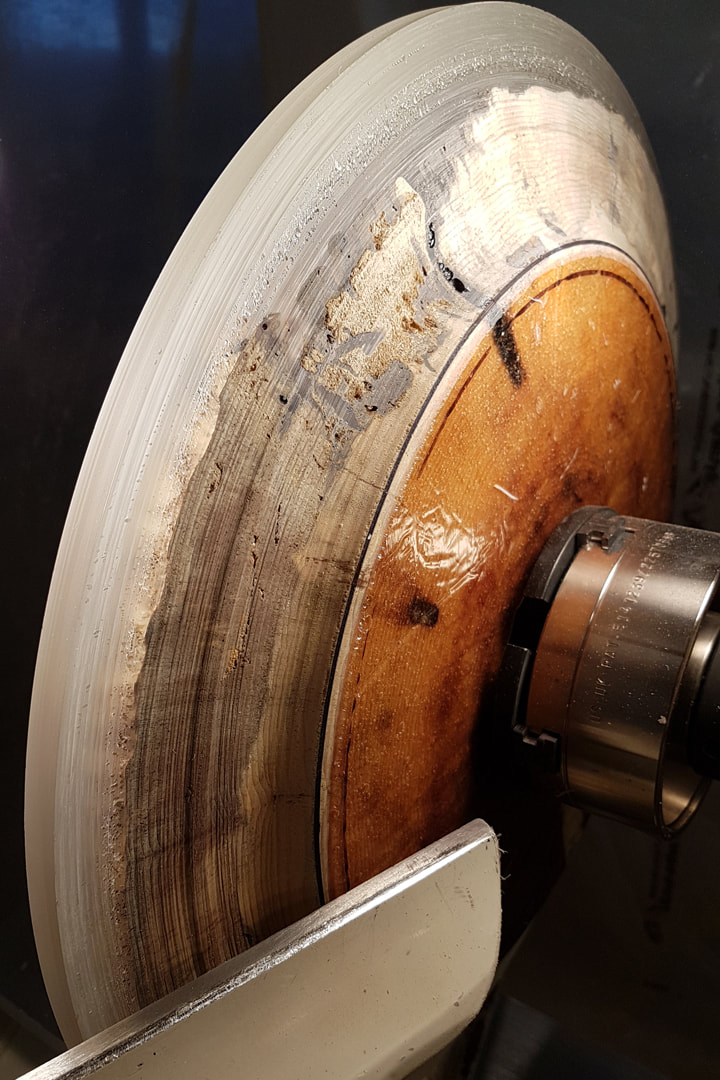
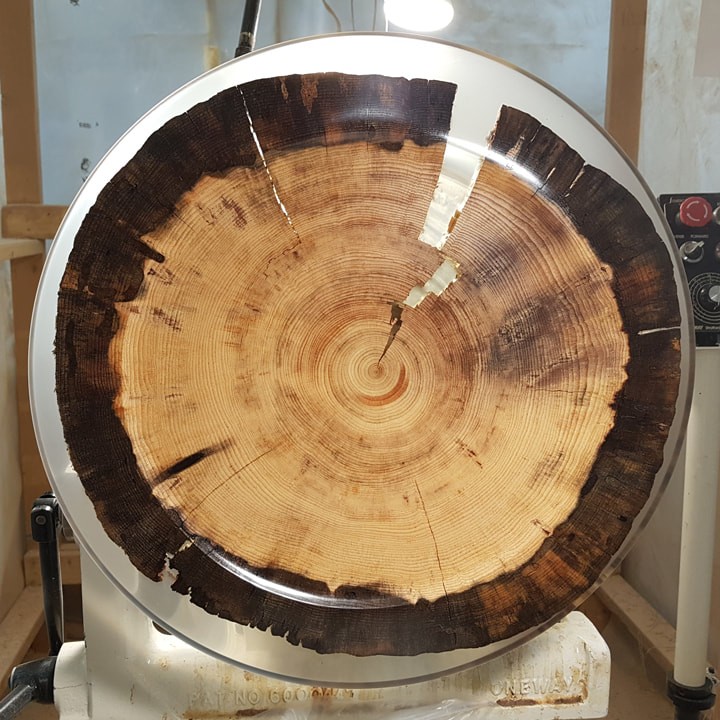
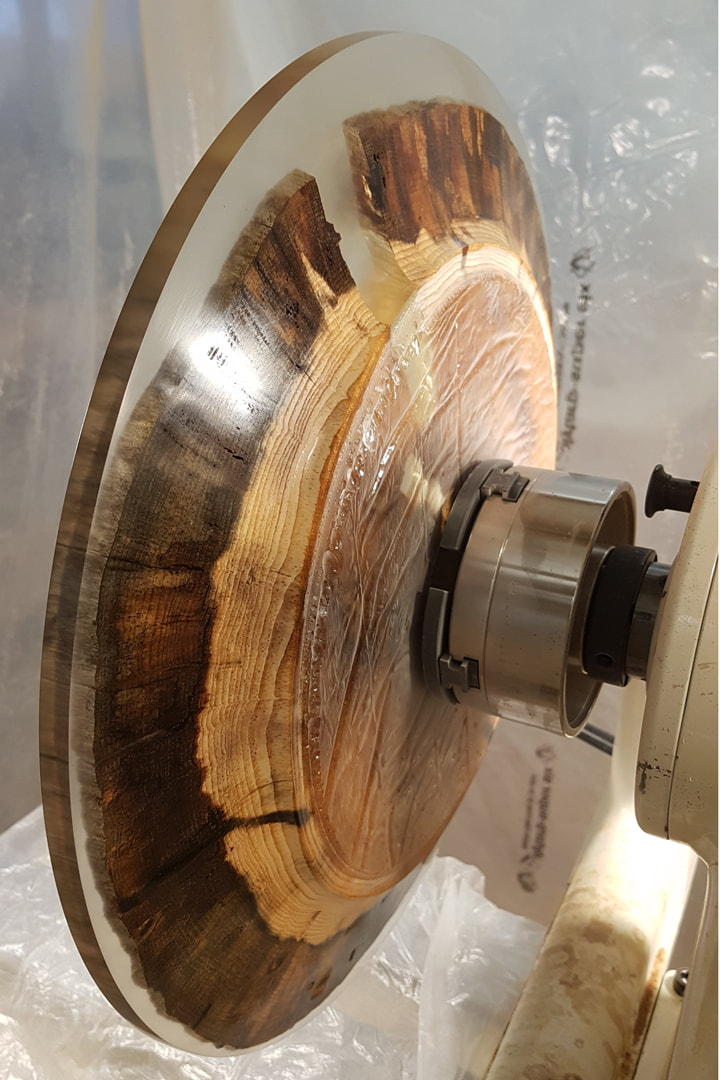
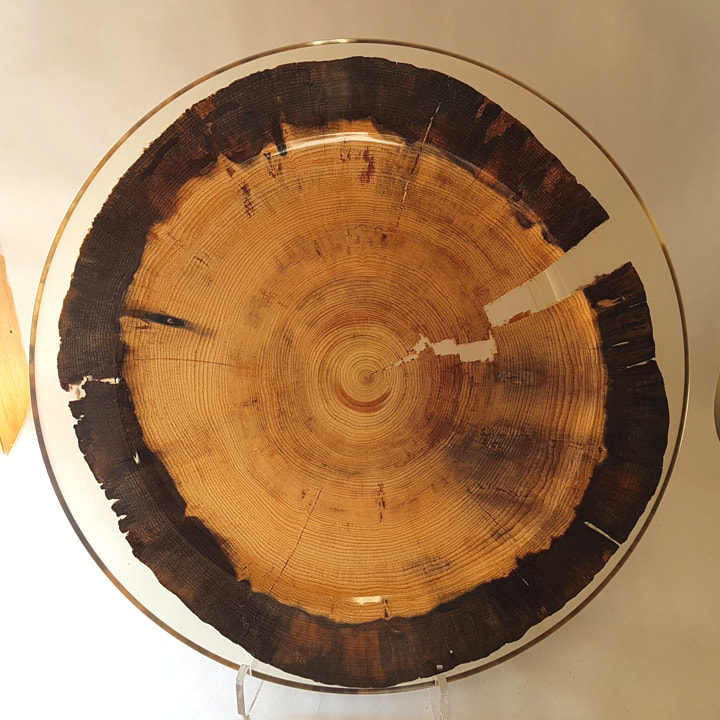
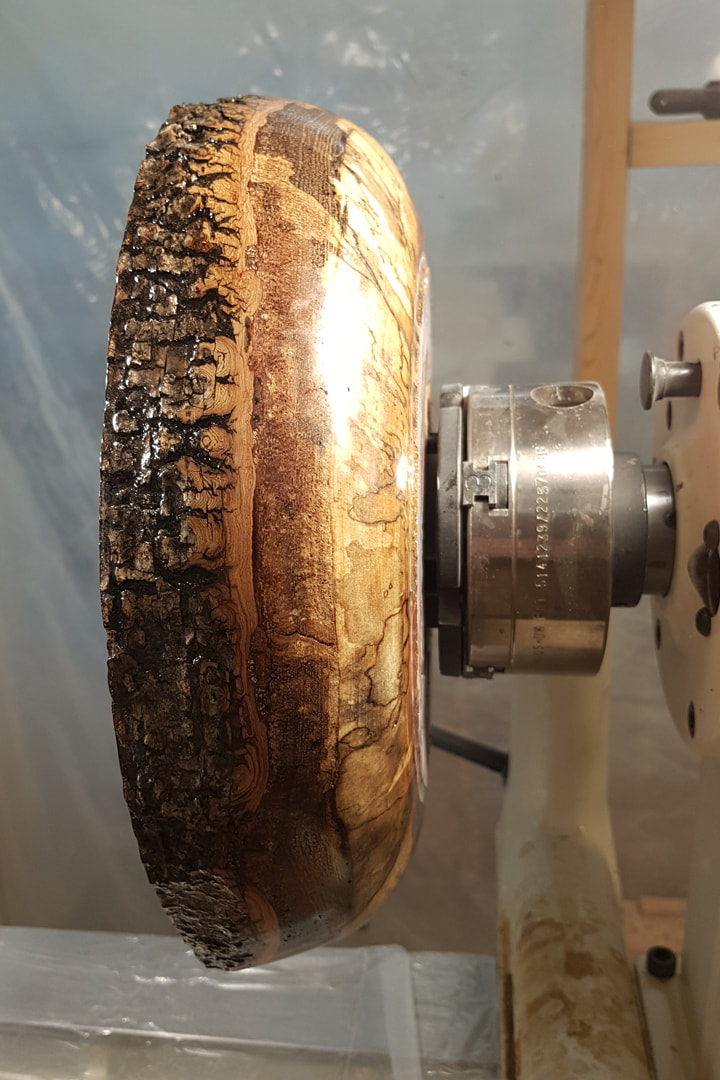
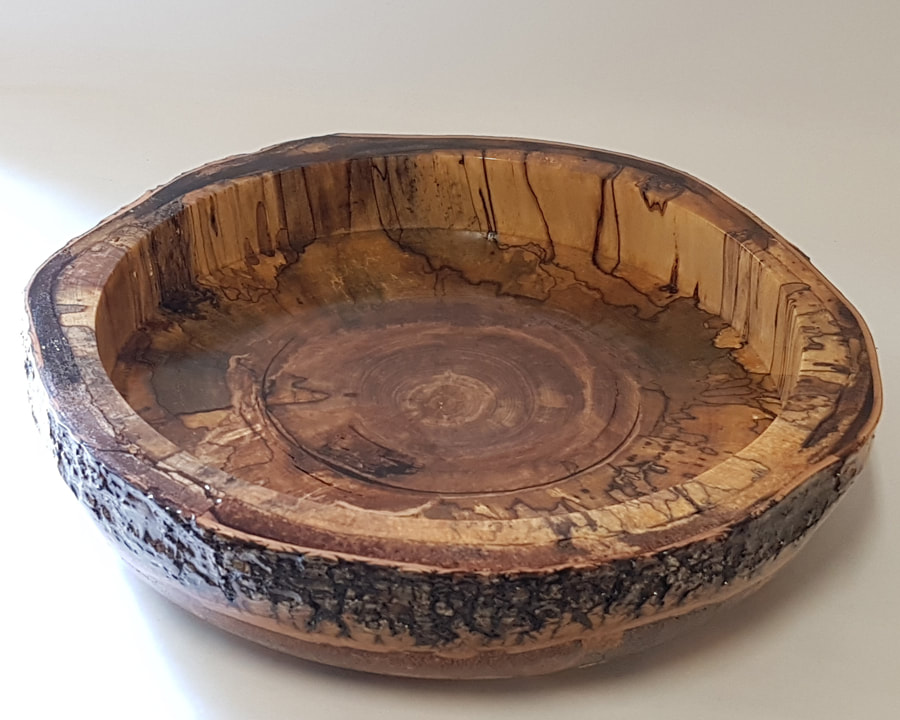
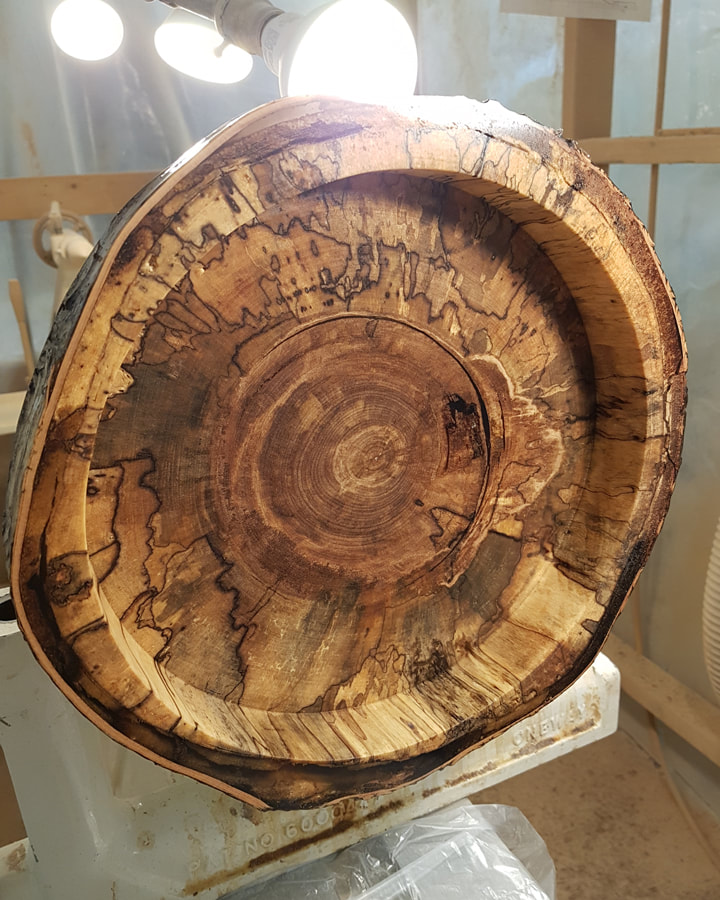
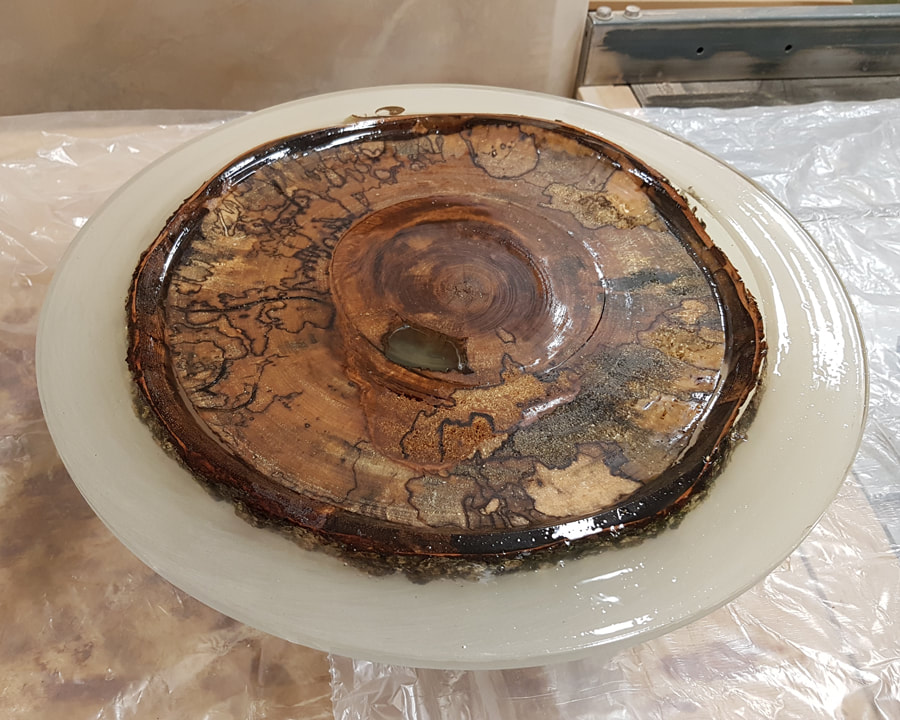
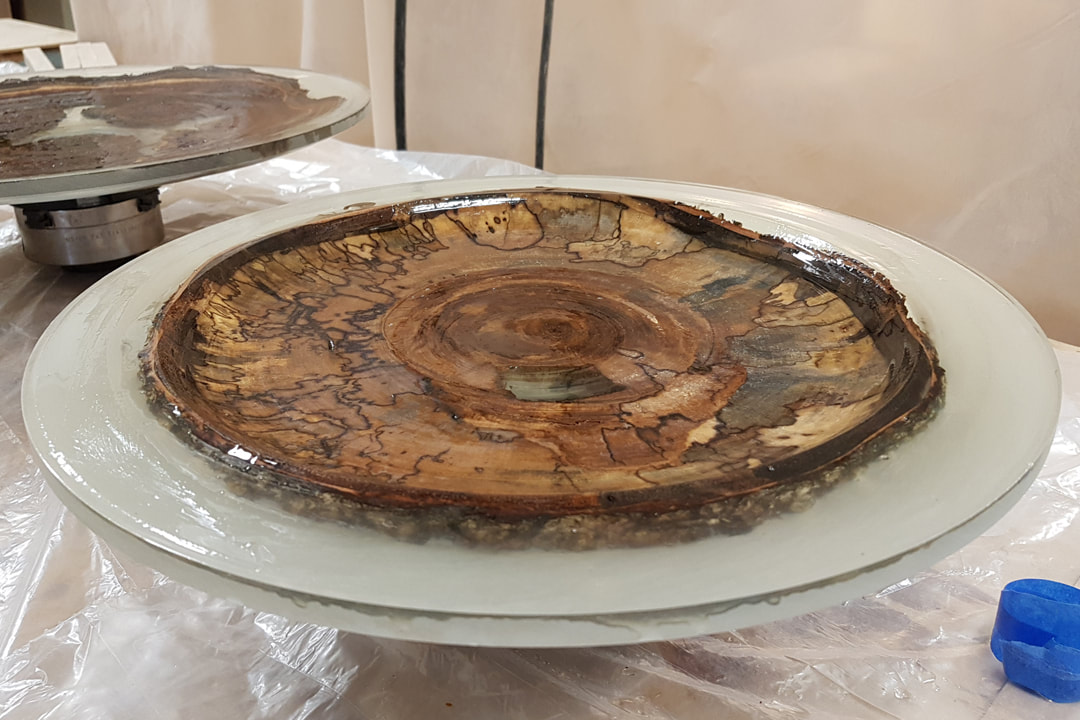
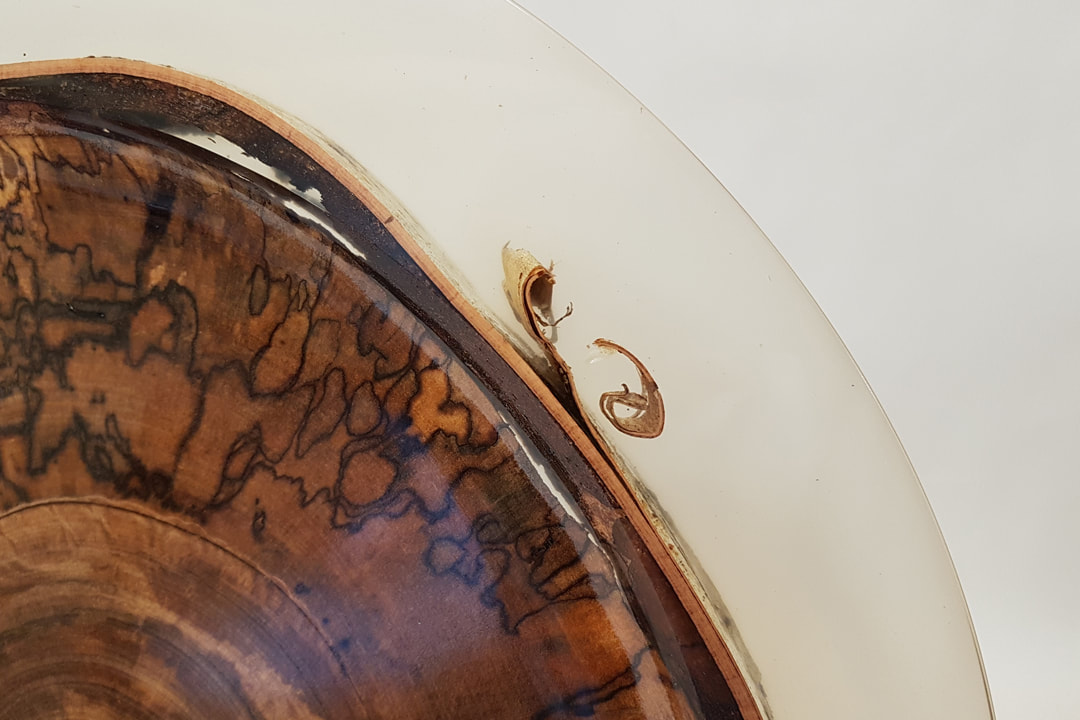
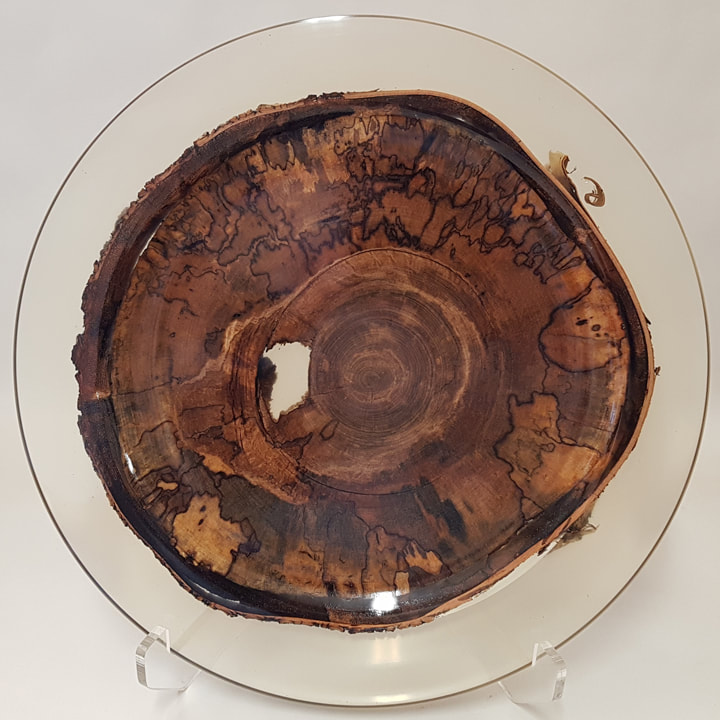
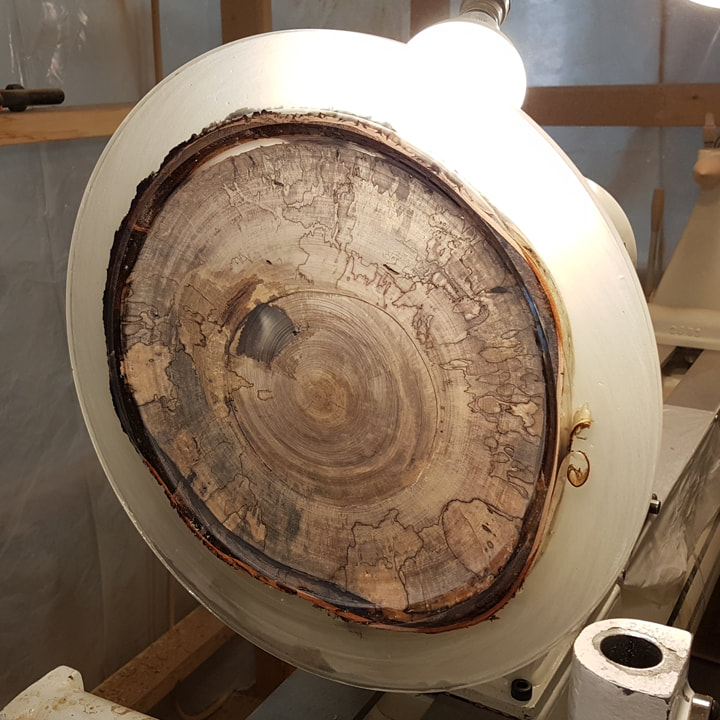
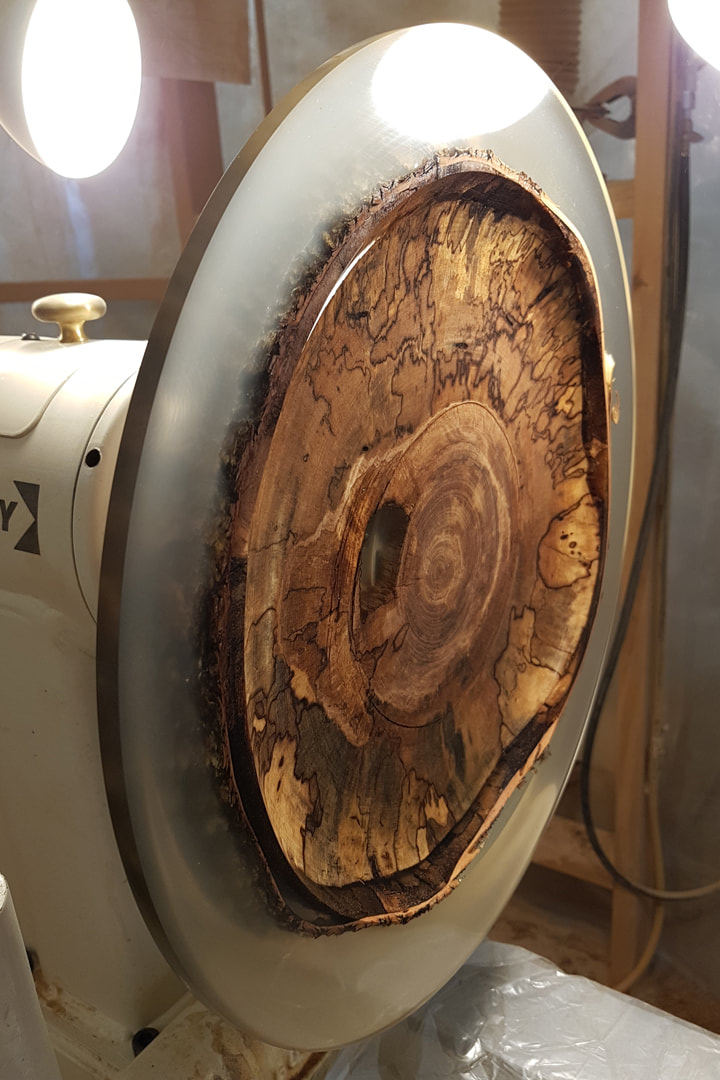
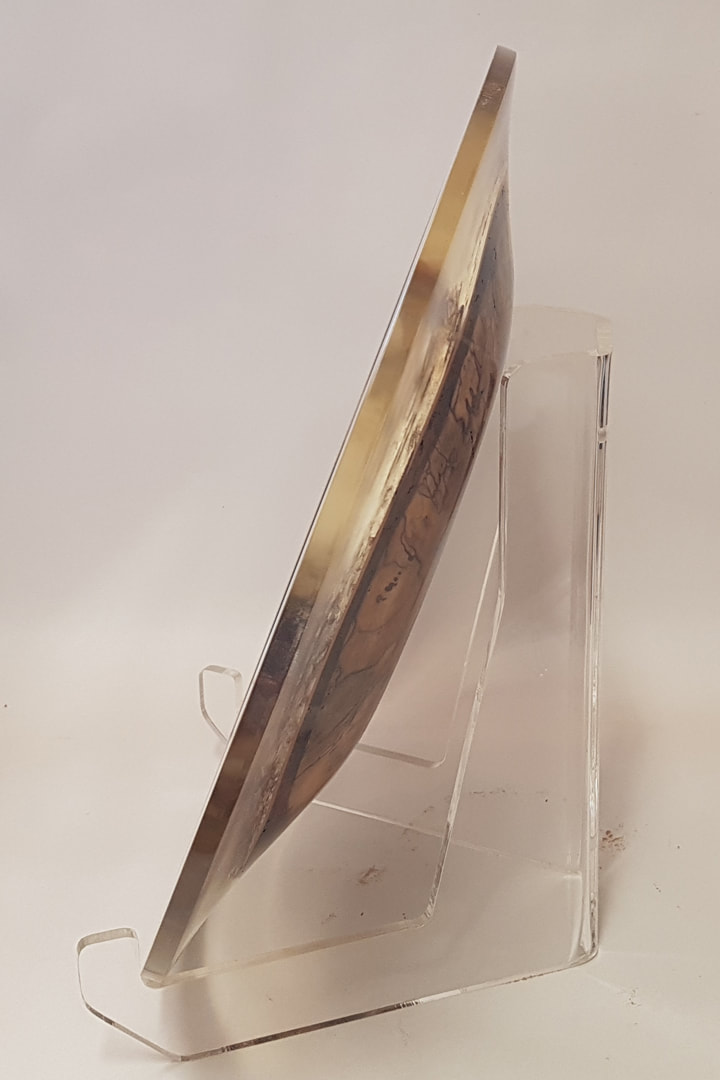
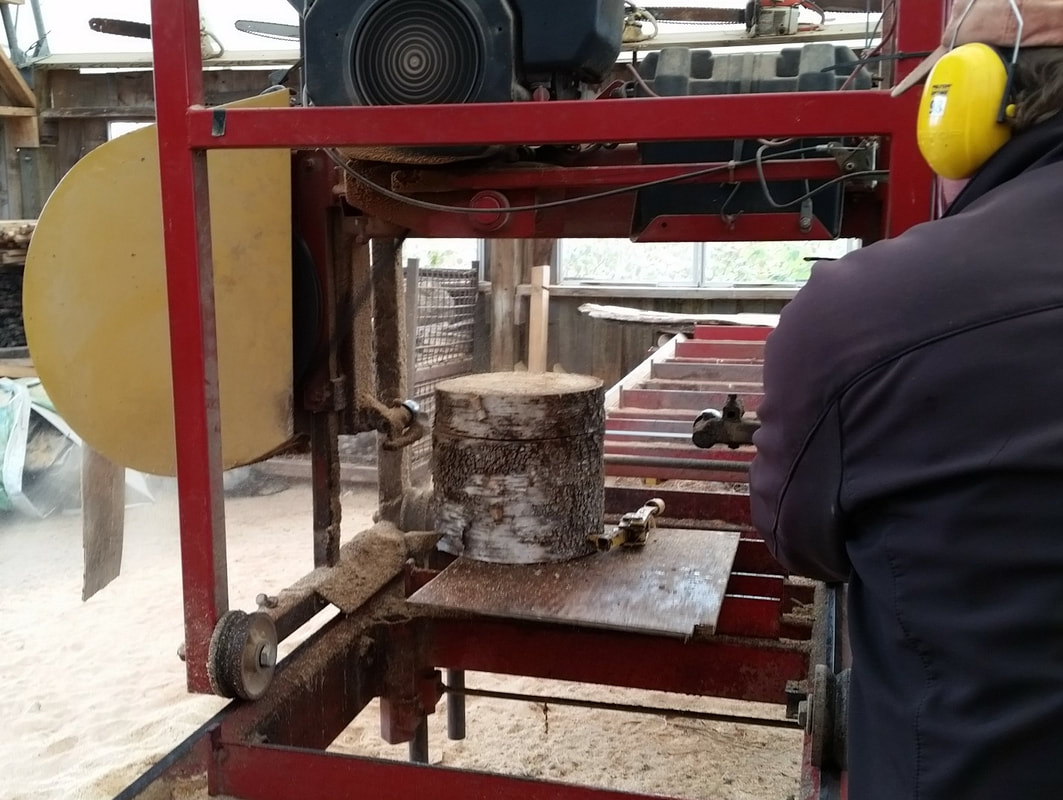
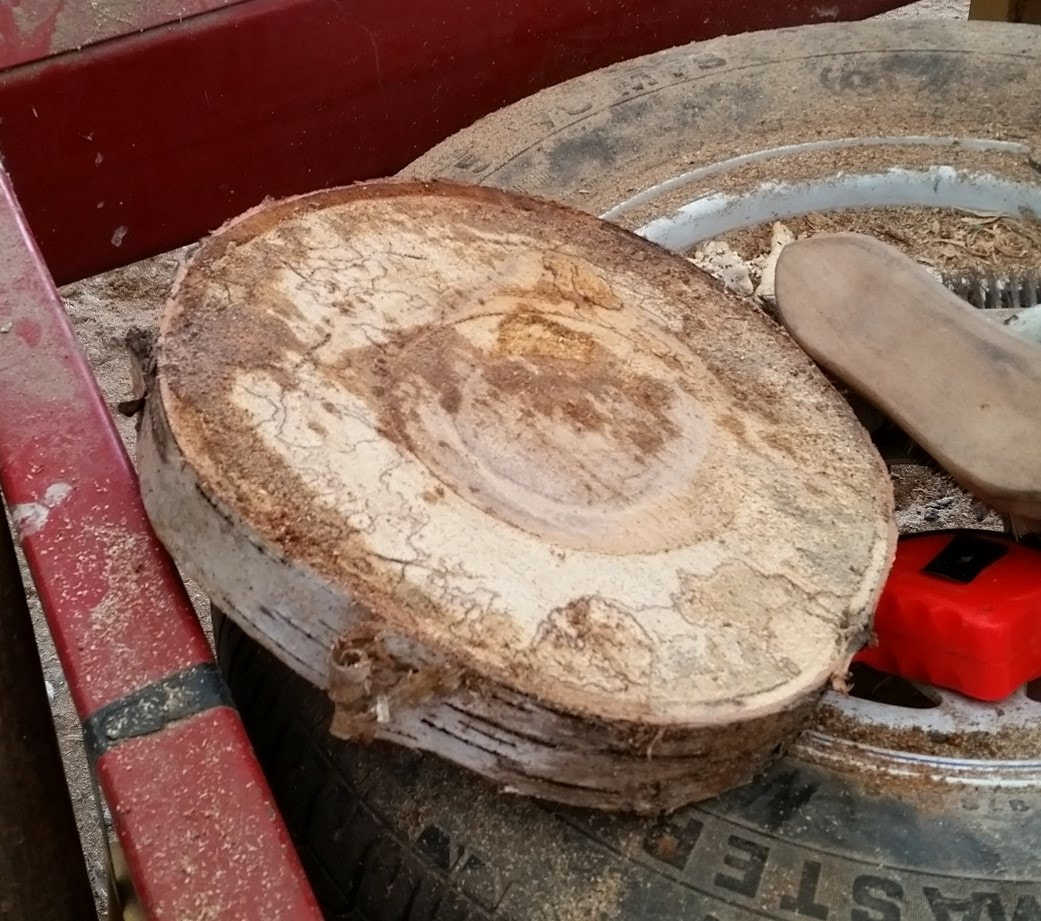
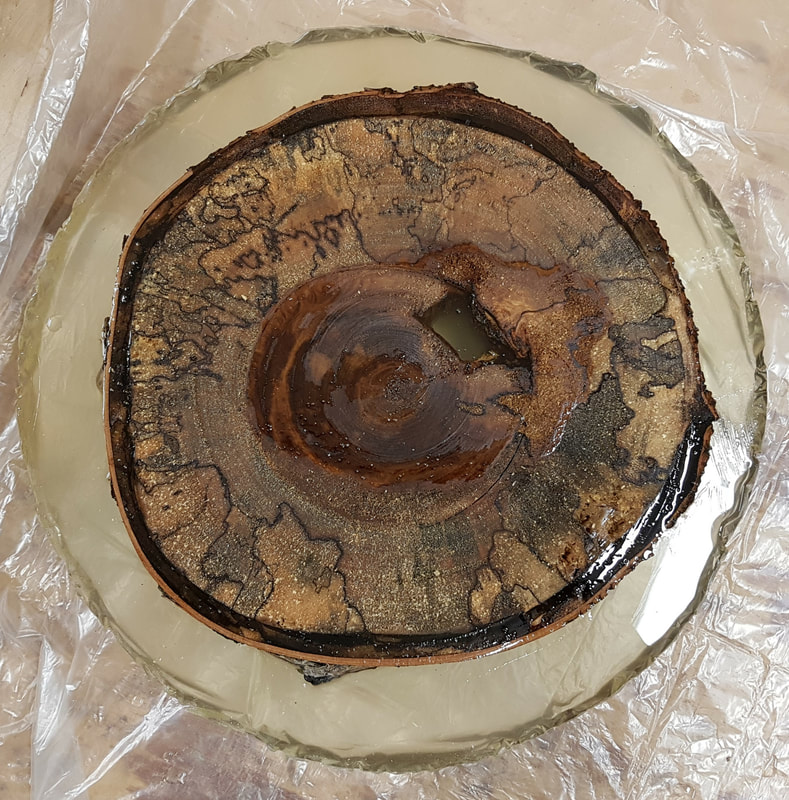
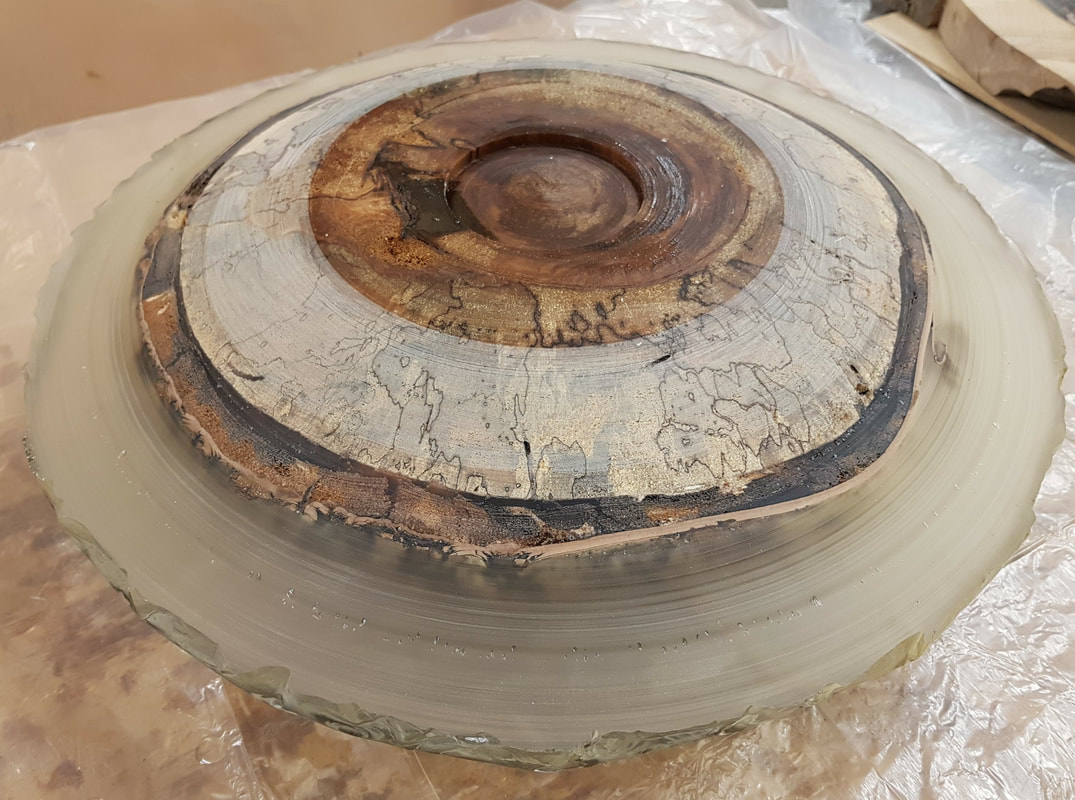
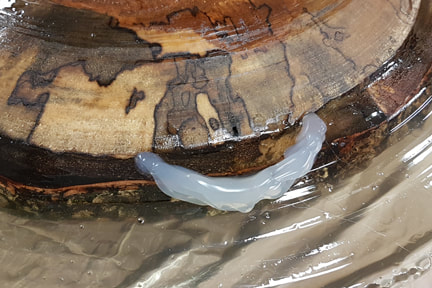
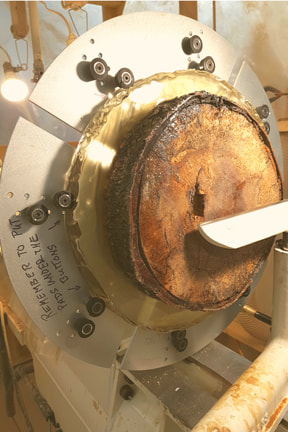
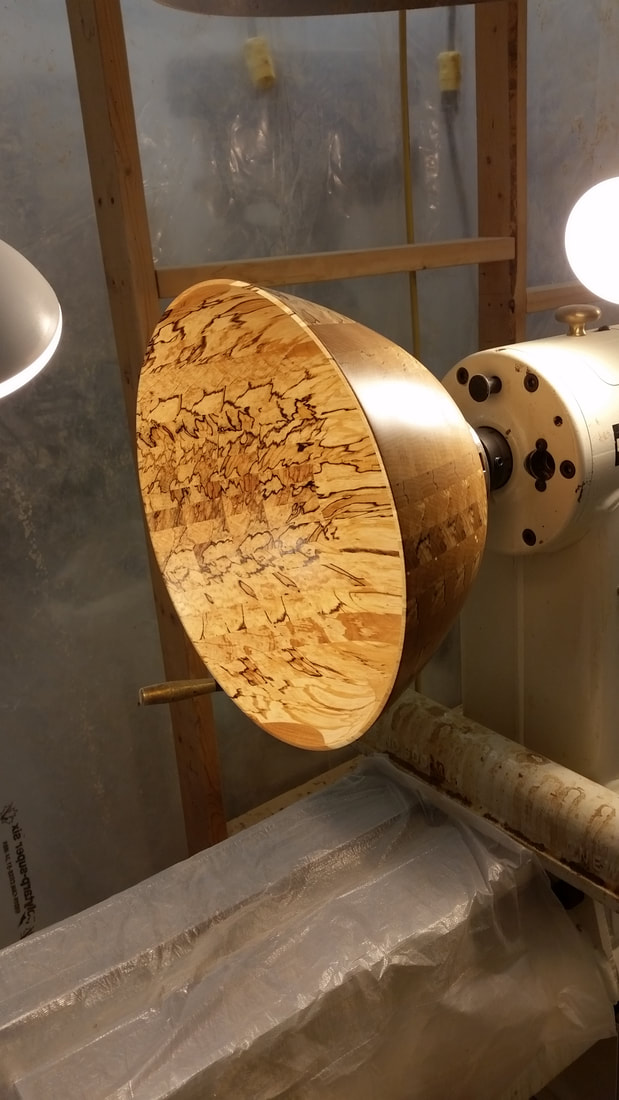
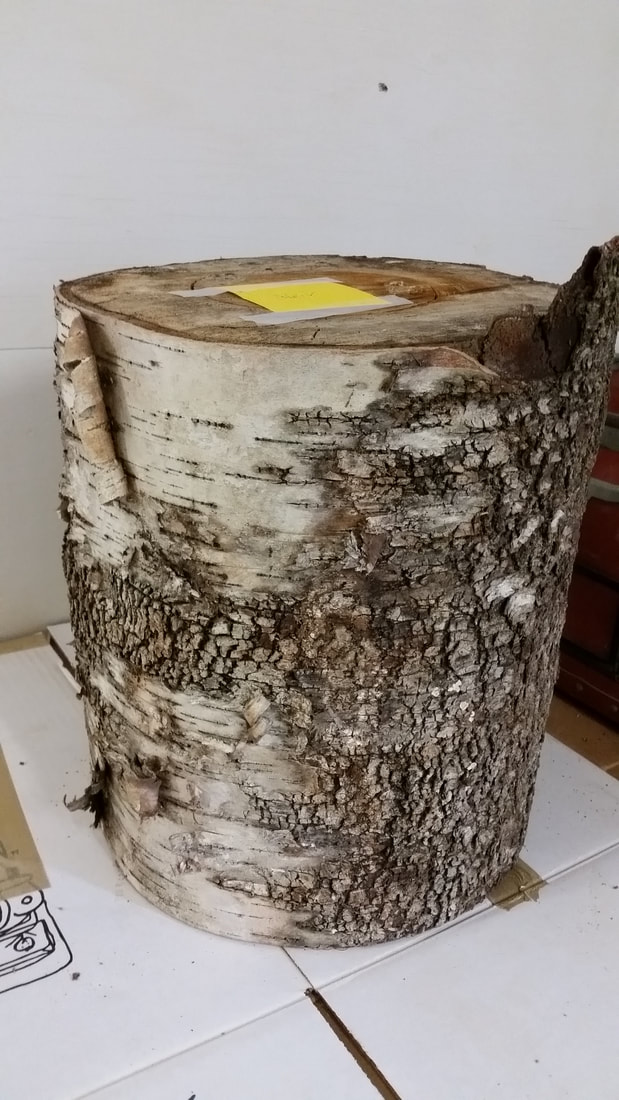
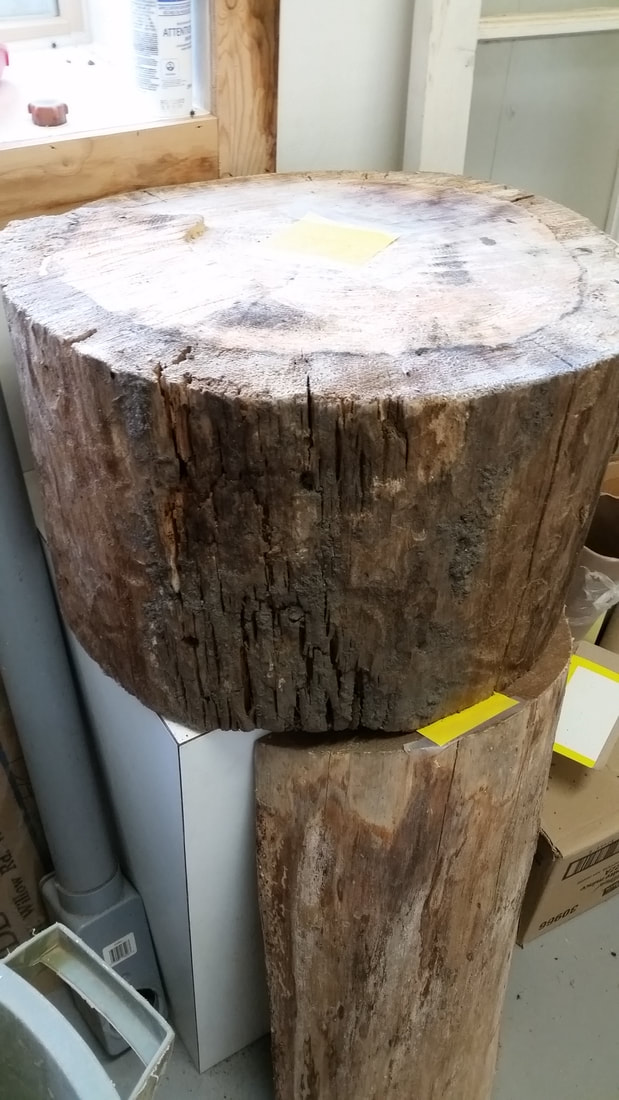
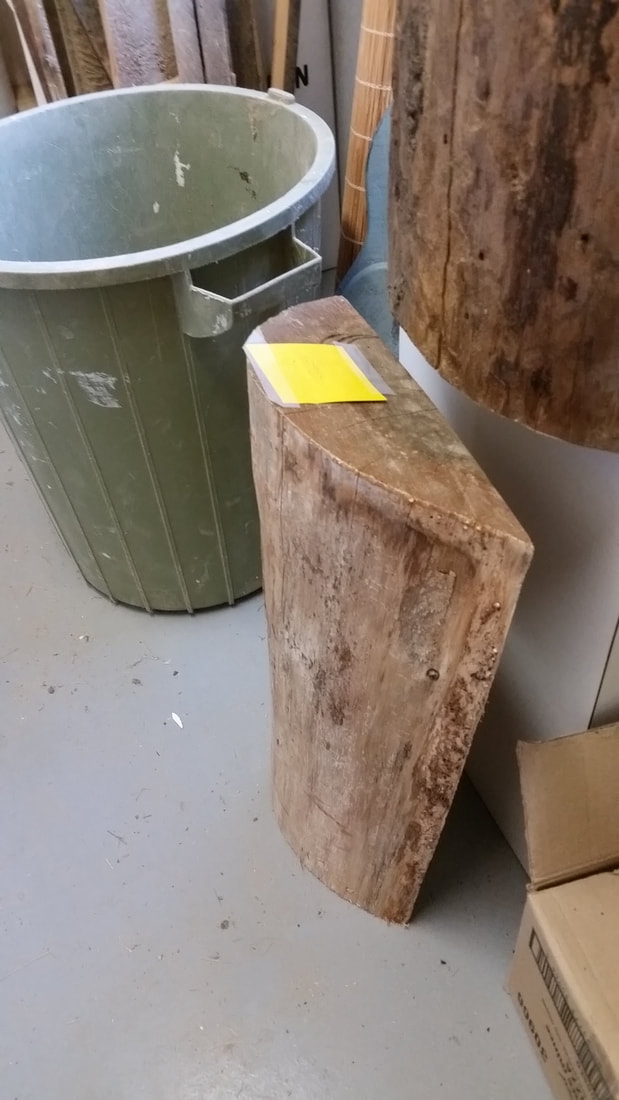
'The Watcher' was an exploration in the world of old and rotting wood stabilized with clear epoxy.  Since making this piece, I have made a second one and have a third ready to go on the lathe.  Each time I tackle one of these I learn something more.

This piece started as a very old oak tree from an island in the Pointe au Baril area of Georgian Bay in Ontario.  

I was able to get a piece from one of the main stems of this tree.  The tree was dying and threatening a cottage which necessitated its removal.  These trees grow under duress in a challenging climate.  Thus they grow slowly and are quite dense.  The year rings for this tree averaged about 20 to the inch.  This stem which was part of the main trunk was about 19" in diameter, making it close to 400 years old.

I was able to get 5 slices from this piece of oak.  I also had another piece from the same tree although it was not as dramatic.  The slices from the saw milling are stacked to dry in the studio.  They sat there for the better part of 6 months. (See image on the right.)

Below are the 5 slabs I started to work on.  The piece in the foreground was to become 'The Watcher'.
Picture
Picture
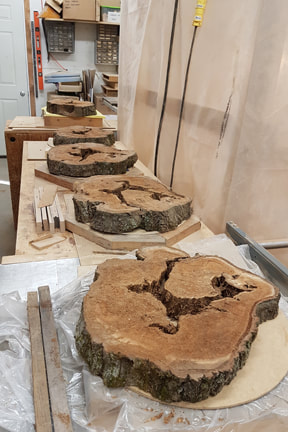
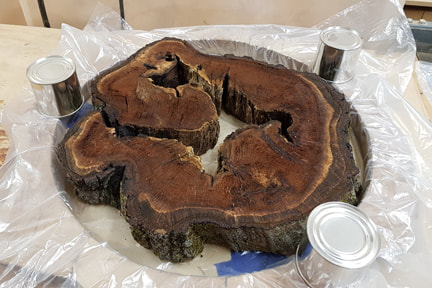
On the first one I poured the outside and the inside at the same time.  I was pouring at about 1/4" at a time.  This way I was able to eliminate almost all the bubbles and keep the epoxy from cracking.

I also worked the epoxy into the wood to give it a uniform hardness.  The cans around the sides of the mold were for holding the cover I put over the piece while the epoxy hardened.  To keep the dust out I would then put a clean, clear garbage bag over the whole works.

Notice that the mold is also lined with a clear garbage bag.  The epoxy doesn't stick to polyethylene.  I no longer use garbage bags to line my molds.  I have made a number of molds that are more accurate than the ones I used here and therefore cut down on the amount of work required to clean up the blank down the road.  The new molds are designed for quick release and are buffed a number of times using mold release wax.
Picture
Picture
Picture
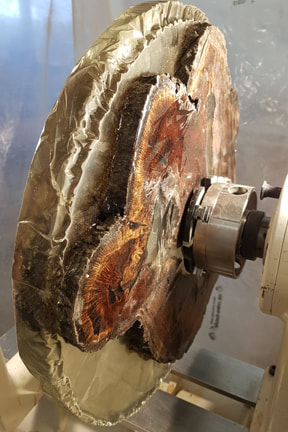
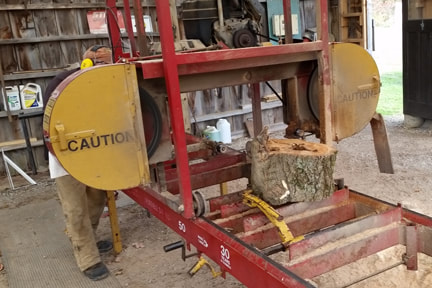
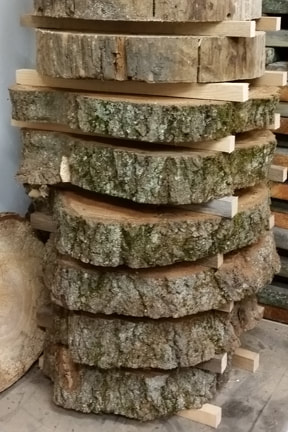
The first order of business was to clean up the wood and get all the dead bugs, cobwebs and other stuff loosened and away.  This was accomplished using compressed air.  

I was going to , literally, encase the wood in epoxy.  This required putting it in a mold and carefully pouring epoxy in the middle and around the edges.  I wanted to make a very shallow bowl.  On the first piece I did encase it in epoxy but in the making of the bowl I turned about 80% of the epoxy away.  On the second piece, I constructed a mold that allowed me to pour the inside up to just beyond the half way point on the thickness of the wood and then pop it out of the mold, turn it over, set it back in the mold and pour the outside up to just over half way again.  This gave me about a 30% savings on the cost of the epoxy.
Picture
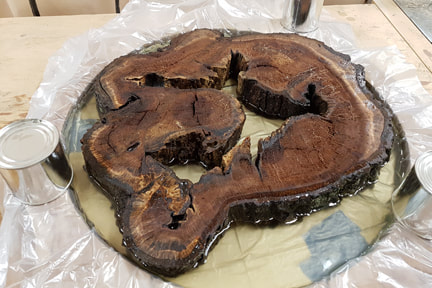
The second piece I made from this wood was called 'Witness'.  'The Watcher' and 'Witness' are so similar that I have used images from both pieces for this blog.
Picture
These two images are of 'Witness'.  The epoxy savings are apparent in the image on the left.  However, I will show in the next part how using the plastic garbage bag cost me some considerable extra time in finishing the turning of the bowl.

Part 2 will be coming soon.

Until then...

P.S. Remember that you can click on any image to see an enlargement.
0 Comments

An Addendum to A Little Sojourn

2/17/2019

0 Comments

 
I wanted to add a short blog about the finishing process that I went through on the bottom of this piece.  If you are not into finishing and related techniques, this would be a good place to stop.

​It took me several tries to get the finish right on this piece.  It is very different than finishing a salad bowl such as the one below in many respects but is similar in other ways.
Picture
Picture
​For the preparation for the 5th coat, I buffed the slab with 0000 steel wool while it was spinning on the lathe.  With the piece stationary I gave some extra buffing to a couple of sections that needed more attention and to the bark areas on the perimeter.

This time when I applied the finish I started in the center with the brush and worked towards the outside.  I made a new cloth pad that was twice as big as my regular ones and more absorbent.  I started from the inside and worked towards the outside.  This worked very well and I got a great application.

​
I did take some video of this process but it needs editing and that is for another day.

Until then...

P.S. Remember that you can click on any image to enlarge it.
Picture
The technique is the same but that is where the similarities end.

The first coat was applied after sanding to grit 400.  This was pretty straight forward.  The finish was allowed to be absorbed for a short time with the excess being wiped off with a cloth pad.

Normally, I buff with steel wool between coats.  As this surface area was so large I decided to sand with grit 400.  I did this on the lathe using my drill and sanding pads.  This was a mistake as when the finish had dried I left new sanding lines behind.

After the second coat I sanded by hand with grit 600 and I did it with the piece off the lathe.  I was able to see the holidays and excesses left by the previous coat and to remove them.

The next coat went on much better and with better results.  I applied this finish by working in from the outside, re-charging my brush when it started to get dry.  Then I started wiping back the finish with a cloth pad.  I started in the center and worked my way to the outside.  There problem was that the first finish applied had started to tack.  The area in the middle of the piece looked great.  The outside, not so good.

If it is not apparent, it should be noted that I do all my finishing on the lathe.  I have more control over what I do and the finish can be put on and wiped back in a uniform manner.

When the finished dried this time I buffed the whole back with 0000 steel wool but again, I did it off the lathe.  I was careful to look through the light and eliminate any anomalies.  When I put the finish on this time I used a new can which has a longer tack time.

​Again, I put the finish on from the outside towards the center and wiped back towards the outside.  This worked quite well except that the pad overloaded with finish and was dripping on the floor.  Fortunately, none of the drips landed back on the piece.

A Note About Dealing with the Irregular Edge

For the most part this piece looks round but it isn't.  We tried to get the face plate in the rough center and succeeded quite well.  However, when finishing out over the bark, the brush grabs and the pads catch on the sharp edges.

The technique that I finally arrived at to deal with this was to apply the finish with the brush to where it was just starting to cover the bark in some parts of the perimeter.  Then when I was wiping back with the pad, I would hold it in such a way that the excess finish was being pushed towards the outer edge.  When the pad got to about where I stopped using the brush I stopped the lathe and manually pushed the excess finish out onto the bark with the pad always working from the inside and towards the edge of the piece.  This was very successful and eliminated any dripping.
0 Comments

A Little Sojourn in the Present

2/14/2019

0 Comments

 
I am taking a little break from the past to cover a piece that I am currently working on.  Part of the reason is to remember what I have done and to help my thinking moving forward to the completion of this turning.  The rest is to give me a break from writing about the wood and epoxy pieces.  The next piece in that series is a highly complex turning that went through a roller coaster ride of processes but ended up being very successful.

In the late fall of 2017 a client brought in the slab of pine at the right.  At its widest point is was 32" in diameter.  I have trouble saying no to a challenge and this was no exception.  However, a few days in, I was having second thoughts about this.  On the plus side, I had about a year for the piece to become fully dried and on the negative side I had to decide what I was going to do at the end of that year.


Picture
I was decided that the flat side should be the top and the bottom of the piece should be turned first.  The reasoning behind this was that the first time on the lathe would have to be done using a face plate.  In order to turn the screw holes away they would have to be on the top of the piece.

The first thing to do was to fill the crack.  This was started in early December.  A piece of 1/4" particle board was waxed with mold release and hot glued to the flat side of the slab.  Another piece was added to the vertical part of the split.  With the blank upside down the gap was filled with a single pour of epoxy tinted with blue colouring. This was allowed to harden for several days.  The pour did not go well as several large cracks appeared.  This required 3 small pours to fill the cracks and make the slab ready to turn.

There was one other epoxy job that needed attending to before the piece could be put on the lathe.  The bark had started to pull away in places and to keep it with the slab I had to pour epoxy in the gaps around the rim.  To keep the epoxy from leaking away the face plate side had to be hot glued along the join between the bark and the wood.

With the epoxy satisfactorily poured and hardened the bottom part of the mold was removed.  The vertical part was left in place to ensure the integrity of the rim.
The particle board did not come away as cleanly as I would have liked but that would be dealt with later.
Picture
The turning had to be done using a free standing tool rest.  Different but satisfactory.  As the piece was not round and had a heavy side to it, it was necessary to turn it a slow speeds.  This meant keeping the tools sharp and being very patient.
Picture
Picture
​After the wash coat was thoroughly dry I set about filling the cracks that had appeared in the turning process.  In order to keep the epoxy from flowing away I used hot glue barriers and dams to hold it in place until it hardened.  It took several rounds to fill these cracks.

Filling the cracks was frustrating.  In the future I will make the initial pour in a series of steps which should completely eliminate this problem.

When the epoxy was hardened the hot glue barriers were removed.  The piece was mounted on the lathe and sanded through grit 400 after which the first coat of finish was applied.

Picture
I made this jig on casters that matches the height of the bed almost perfectly.  I am able to undo the bolts and roll the bed away to a storage area.  I was worried that the weight of the bed would make the jig top heavy so I used a tie down to securely fasten the bed to the jig.  Surprisingly, it worked perfectly the first time.
Picture
This brings me to the present.  Today I put the 5th coat of finish on the bottom of the piece.  I think it needs one more coat.  I will have some help next week to mount the chuck, remove the face plate and re-mount it on the lathe to turn the top.  Doing the top will be similar to doing the bottom.

I will have more on this turning later.

Until then...

​P.S. Remember that you can click on any image to view an enlargement.
Picture
I put the piece in my heated wood room to dry thoroughly.  

​In April of 2018 I looked in on it and noticed that a crack was forming from the edge towards the center.  I knew that this was part of the drying process but it added a complexity to the completion of the turning.

All the turning would be on end grain so the wood would have to be sealed using a wash coat of epoxy.  By employing this method the dry wood could not respond to its environment because it would be totally sealed.  Therefore the crack would not close on its own and would have to be filled.  This would be a problem to be solved further down the road.

After seesawing back and forth between a large shallow bowl and a table top, I finally, in the late fall of 2018, decided on a shallow bowl.  The table top was really a cop out and would not have satisfied me as having met the challenge.  The client had given me total freedom in what to make and I wanted to give him something that would blow him away.
Picture
The rough center of the slab was determined and the face plate mounted with the maximum number of screws.
Picture
Picture
The piece was finally mounted on the lathe and it took two of us to get it there.  

​I usually turn outboard so I have a bed on that side of the lathe.  This had to be removed.  That was a bit of a job in itself as it hadn't been off the lathe in many years.
Picture
Finally the piece was turned and rough sanded.  The turning and sanding revealed additional cracks in the epoxy. 

​Note the chuck hole in the center of the back side.  This will be how the piece will be remounted on the lathe to turn the top side.

The wood I had been turning was all end grain and it was necessary to ensure that the piece wouldn't split or fall apart at some point down the road.  At this point the sanded surface plus the bark was given a wash coat of epoxy.
Picture
It took two of us to get it off the lathe after the first coat and it was with difficulty that we didn't damage the finish.  There had to be a better way of doing this.  The other drawback was that I would only be able to work on this piece if there was someone else in the studio with me.  I have two apprentices who come several times a month so this this would mean that it would take me the better part of a month to finish just the bottom of the piece.

Part of the difficulty in working with a slab this big is the removal of the outboard lathe bed.  I found that it takes two people to accomplish this; one to hold the bed and the other to release the bolts.

​I decided that if I could work out a way to remove the bed without help I might be able to put on a coat a day and considerably reduce the finishing time.
Picture
The piece was reduced in weight and I was able to manage it myself.  I fixed the lathe shaft in place and slowly turned the slab on to the head stock by hand.  This worked and I was able to buff the piece on the lathe and apply the next coat of finish.

I solved the problem of removing the wet piece from the lathe by not removing it.  I put the finish on as the last job of the day and leave it on the lathe overnight to dry.  In the morning, I take the piece off the lathe and put it in the finishing room, restore the bed to the lathe and carry on with the rest of my jobs for the day.  At the end of the day I, once again remove the bed and put the piece on the lathe and apply the next coat of finish.
Picture
0 Comments

The Questionable Pine - Part 2

2/13/2019

0 Comments

 
My goal with this piece was to retain the shape but not necessarily the texture of the outer edge.

The first order of business was to fill the split that had developed while the wood was drying.  To do this I created a dam out of waste wood.  Before securing it to the pine I coated the dam with 5 layers of mold wax.  This would allow the dam to come away when the epoxy hardened.  The dam was held in place and thoroughly sealed using a hot glue gun.

In order to keep the epoxy bubble free on the one hand and from cracking on the other, the gap was filled in a series of pours.  While this takes longer, patience is rewarded by having a minimum of frustration.
Picture
Picture
A thorough wash coat of epoxy was applied to the piece to give it integrity.  A thicker coat of epoxy was then applied to fill in the myriad gaps around the edges.

​Once out of the makeshift mold, the bottom was given a similar treatment to fully seal the wood.  

Once on the lathe, the pieces was turned in several sessions with wash coats  of epoxy between each one.

​Again, this is a time consuming procedure but it prevents irreparable tear out.  The wash coat of epoxy needs at least 24 hours to harden sufficiently.  I usually allow longer if there is no rush for the piece; sometimes several days.

This cross section was turned as a shallow bowl. 

Completing the edge required additional patience.  I waited until the front and the back were turned and sanded before addressing the edge.  This meant that there was no excess surface area to smooth out.
Picture
Please remember that you can click on any image to see an enlargement.

​There is more to come.

​Until then...
Picture
​Due to the irregular shape of the wood a regular mold was out of the question.  However, some kind of containment was necessary as the perimeter of the wood was porous and soft.

To accomplish this I placed the wood on a new, clear garbage bag (epoxy doesn't stick to a plastic garbage bag) and wrapped the outside with masking tape and then sealed that with packing tape.

Below is a view from the top and to the left is a detail shot.
Picture
Picture
Picture
​​I put the lathe on the slowest speed and allowed the sander to follow the edge.  It took some time but I was able to sand through the grits to 1000.  Normally, I don't sand to such a high grit when working with pine but the epoxy requires this to eliminate the scratches.

Although challenging, this slab turned out quite well.

​I called the piece "Life Span".  It was about 16 1/2" in diameter by 1 5/8" tall.

Picture
0 Comments

The Questionable Pine - Part 1

2/5/2019

0 Comments

 
This piece was similar to the birch in that to cut it lengthwise would have produced too much waste and possibly not enough to make a decent turning.

​This wood was also taken to the sawmill and cut cross grain.
Picture
Like the first piece of birch the first slab of pine was put in a mold and both filled and surrounded with epoxy.  It was then put on the lathe and turned.
Picture
In the image on the right you can see the tear out that occurred.  To make the wood harder for final turning and sanding, a wash coat of epoxy was applied.
Picture
The finished platter was called "Gatineau Sentinel".  It was 17 5/8" in diameter and 1 1/4" tall.

Another piece was made from this pine but that is for the next post.

Until then...


​As in all my recent posts, you can click on any picture to see an enlargement.
Picture
Picture
The image on the left shows the turning just after the wash coat had been put on.

The piece was allowed to sit for several days to allow the epoxy to properly harden.  Touch up turning was done then the piece was sanded to grit 1000.
Picture
Picture
Picture
0 Comments

A Few Words About the Epoxy I Use

2/4/2019

0 Comments

 
I have talked a lot about epoxy in the previous posts without giving much information about it.  I hope to rectify that here.

Where I get my epoxy and what I buy
First of all, I buy most of my epoxy from Noah's Marine.  Info on Noah's can be found here (scroll down).  Specific info on the resin can be found here.  I use the medium hardener.  I also use the pigments that Noah's provide.  They can provide measuring accessories as accuracy is essential.

There are many epoxies
​I have tried other epoxies but for the most part they have specific uses and are not applicable to my situations.  Some are meant to cover artworks with thin clear coatings.  Some are more UV stable than others.  Some require higher room temperatures to work or set properly and thus need to be set in warm water baths.

(An update here.  I had a problem with some of Noah's epoxies and that problem is detailed here.  If the page asks for a password, please use 'noahs'.  This is part of the experimenting that I did.  The resulting piece was not very successful.)

Wash coats
I use wash coats to penetrate rotten or very soft woods to give them integrity for turning.  On end grain a wash coat will go in up to 5/16" (8 mm).  In soft wood such as spalted the depth can be anything from 1/8" to 3/16" (3 mm to 5 mm)

When I mix my epoxy it is 2 parts resin to 1 part hardener.  To make a wash coat with the viscosity of water I add another 1 part of lacquer thinner.  If a thicker coat more like a thin syrup is desired then I use less lacquer thinner.  Stir the epoxy resin and hardener first then add the lacquer thinner.

Two cautions about the lacquer thinner
A mask is definitely needed when working with the stuff.  It smells bad and can give headaches.  I get migraines from it.  When I am using it I make sure that the application is the last thing I do before I leave the studio for the day.  My studio is in a separate building.  This should not be done in a home workshop that is part of the house.  

Secondly, the hardening of the epoxy takes considerably longer when using lacquer thinner.  It can take from several days to more than a week.  Lacquer thinner also weakens the epoxy.  I don't use this technique for anything else.

Turning wood strengthened with a wash coat
When I am turning end grain such as that described in the previous posts, I only turn the epoxied wood until the wood starts to tear instead of cut.  I find that using a very sharp gouge, the transition from the epoxied wood is readily apparent.  At this point I stop and apply another wash coat.  It takes much longer to turn a piece this way but the integrity of the wood is essential to the success of the piece.

Sanding and finishing after turning
After I have finished with the gouge and am ready to sand, I apply one last wash coat.  This makes the turned surface hard enough to sand and will give the entire area to be sanded the same density.  This is important as I do not want to introduce texture where none is desired.

I usually sand from Grit 60 to 1000.  Going all the way to 1000 is not necessary unless there are large areas of clear epoxy to be sanded.  The reason for going to 1000 is to completely removed the sanding lines.  I am able to apply my finish over the epoxy but I try not to use more than 3 coats.


I hope this covers some of the questions that may have arisen in the previous posts.  I will go into sanding and finishing in more detail in a future post.

​Until then...
0 Comments

The Rotten Birch: The Second Piece

2/3/2019

0 Comments

 
This piece had to be stabilized in a similar manner to the previous turning.  However there were significant differences in how I went about this.  I didn't use a mold this time.

I had to pour epoxy into the areas where the bark had separated from the wood.  This had to be done in several stages to avoid trapping bubbles inside the gaps.

When this was completed both sides of the piece where coated excessively with a wash coat of epoxy.  The bark area around the perimeter of the piece was also generously coated.
Picture
The top of the bowl had to be trued and then turned in several sessions with wash coats of epoxy in between.  I wanted to leave a generous rim as I didn't want the irregular shape of the bark and the outside of the piece to impact the interior of the bowl.

Also, I wanted the lines from the rot and spalting on the rim to be easily followed to their conclusion towards the center of the turning.

Unlike the rounded soft lines of the outside, I made the bowl with straight sides and a flat bottom.  When looking directly into the piece from straight down the top becomes flat and one is left looking at a cross section of this remarkable piece of wood.
Picture
Picture
The bottom was straight forward.  I well rounded the corner bringing it up the side to leave about an inch of bark.  On this piece the bark was different and there was no compelling need to preserve itinerant bits of it.

After turning, the bottom was given a wash coat of epoxy along with another coating of the bark.  

Once thoroughly dry the bottom was sanded to grit 1000 and given 5 coats of Salad Bowl Finish.
Picture
This turning was called "The Passage of Time".  It was 13" in diameter by 3" tall.

The rest of the wood from this section of a birch tree was not worth saving and was put in the compost pile.

In my next post I will describe how I dealt with the pine that was mentioned in the January 31st installment.

Until then...
Remember that you can click on any image in my recent posts to see an enlargement.
0 Comments

The Rotten Birch - Part 2

2/2/2019

0 Comments

 
With the problems in the bottom of the piece cleared up, the piece was reversed on the chuck and the top was turned.

In much the same way as the bottom, the top was turned.  It took two sessions with a wash coat of epoxy between the them.
Picture
After the first turning and the first wash coat of epoxy.
Picture
After the second wash coat of epoxy but before sanding.
After the second coat of epoxy the piece was returned to the lathe for sanding.  Starting at grit 60 and proceeding through ten grits ending with 1000 the piece was carefully sanded.

Three coats of finish were applied.  Normally, I put on 5 coats of finish but when I am working with epoxy and wood I try to keep the finishing to a minimum.  The wash coat of epoxy makes the wood surface almost as hard as the epoxy so the wood does not absorb the finish.  With more than 3 coats on the epoxy you start to be able to see the finish on the surface and it is distracting.  I apply salad bowl finish and this makes the piece usable for serving food.   
Picture
Picture
This is the finished platter.  The piece was entitled "Caught in Time".  It had a diameter of 16" and a depth of 2 1/2".

There was another piece made from this birch but that is for the next post.

​Until then...
Picture
The top of the platter before the first turning.
Picture
On the lathe after the second turning.
Picture
On the lathe during the finishing process.
On the left is one of the details the piece was designed to retain.  White birch is known for its curly bark and this iconic curl has been preserved.
Picture
By the way, clicking on most images in my recent posts will give a larger picture with more detail.
0 Comments

The Rotten Birch - Part 1

2/1/2019

0 Comments

 
The bark on white birch is waterproof.  Hence, while the bark stays in tact, the inside rots away.

Normally, I would take a piece like this to the sawmill and slice it lengthwise to get a number of pieces about 1 1/2" thick from which I would make a platter or bowl.  If I had done that the entire chunk of wood would have fallen apart.

So instead I had it cut crosswise.  With careful handling it held together fairly well.
Picture
Picture
Below is what the top of the blank looked like before turning.
Picture
And this is what the back side looked like after the first turning.
Picture

Picture
Picture
The wood was cut in the fall of 2017 and stickered in the studio to dry for the winter.

I put one of the rounds in a mold and impregnated the rotten wood with diluted epoxy and surrounded the part of the piece that I wanted to retain with full strength clear epoxy.  (I will talk more about making and using molds in another installment.)

​Below is the blank on the lathe awaiting the turning of the chuck hole.
Picture
The piece had to be turned in several steps.  The reason for this was the wash coat of epoxy could only penetrate about 1/4" to 5/16".  Once this was turned away the rotten wood proceeded to tear out and more penetrating epoxy was needed to harden the wood for turning.

Some problems became apparent after the first turning.  Gaps that needed to be filled with epoxy had to be addressed.

In order to solve this problem quickly, I created small dams with hot glue to hold the epoxy in place until it hardened.  These gaps appeared along the edge of the bark and needed to be filled to secure the bark to the rest of the wood.

I will finish this discussion later.

​Until then...
0 Comments

Interestingly Enough...

1/31/2019

0 Comments

 
For the first time in 40 years I had to drive to work in the morning.  This was something new.  As I said before, I lost the early mornings, late evenings and some stolen time on the weekends in the studio. But in looking back this was the beginning of the period where I would be doing some of my best work.

​Once in the studio I could focus and be without interruptions.  This was something new and I came to embrace it.
Picture
The second bowl

The wood on the right is what I had to been given to create pieces for some very special people.  These were to be ready for June, 2018.

I made 2 turnings each from the birch and the rough pine.  The third piece was the most cooperative and produced a very nice platter.

With the ideal working conditions of the studio I was looking forward to doing more work and exploring with epoxy.
Picture
"Time Echos", Pine
Picture
The first bowl in the new studio
The spalted maple bowl followed closely on the heels of the walnut one and I was off and running.  As Christmas was fast approaching I had to start building my inventory to meet the demand.  This was, for the most part, salad bowls and chargers.  These were the pieces that bought the supplies and paid the rent.

Not only did I have Christmas on the horizon but I had some serious challenges for the spring of 2018.

Picture
Quite rotten birch
Picture
Pine in rough shape
Picture
Pine
This is the straight forward platter that was made from the pine in the image on the right.  Beautiful in its own right showing the grey from the outside of the wood and the rich patina from the inside.  

The platter had a short story about the wood hand-written on the back.

The other two pieces of wood were more complicated and deserve their own space.  I will write about them in the next installment.

​Until then...
0 Comments
<<Previous

    RSS Feed

    Categories

    All
    Agreements
    Art And Craft
    Chargers
    Collaboration
    Donations
    Finishing
    Galleries
    General
    Introduction
    Made Of Wood Show
    Salad Bowls
    Shows
    Studio
    Video Update
    Website

    Archives

    February 2019
    January 2019
    August 2017
    April 2017
    April 2014
    March 2014
    January 2014
    November 2013
    October 2013
    September 2013
    August 2013
    January 2013
    October 2012
    May 2012
    April 2012

Picture